

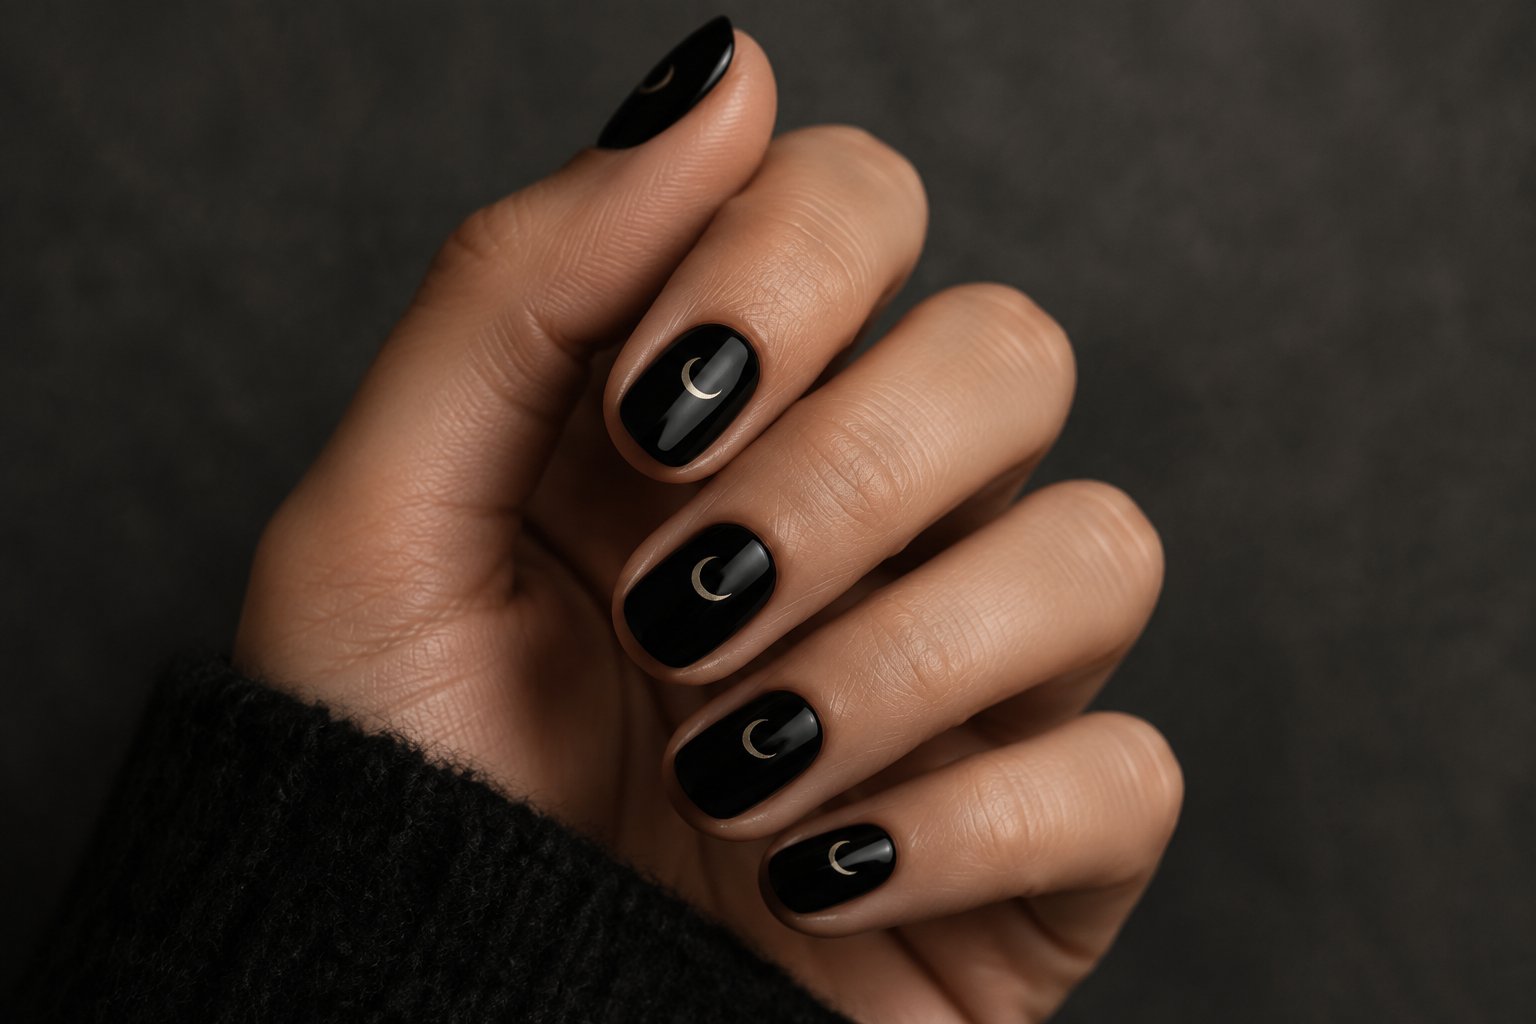
✨Black polish is the easiest way to give your nails a witchy mood. Once you add a moon, a web, or a smoky fade, it starts to feel like a personal spell. You get to decide how loud it is, from a tiny crescent on a short nail to a full set of stiletto acrylics that looks like it has its own backstory.
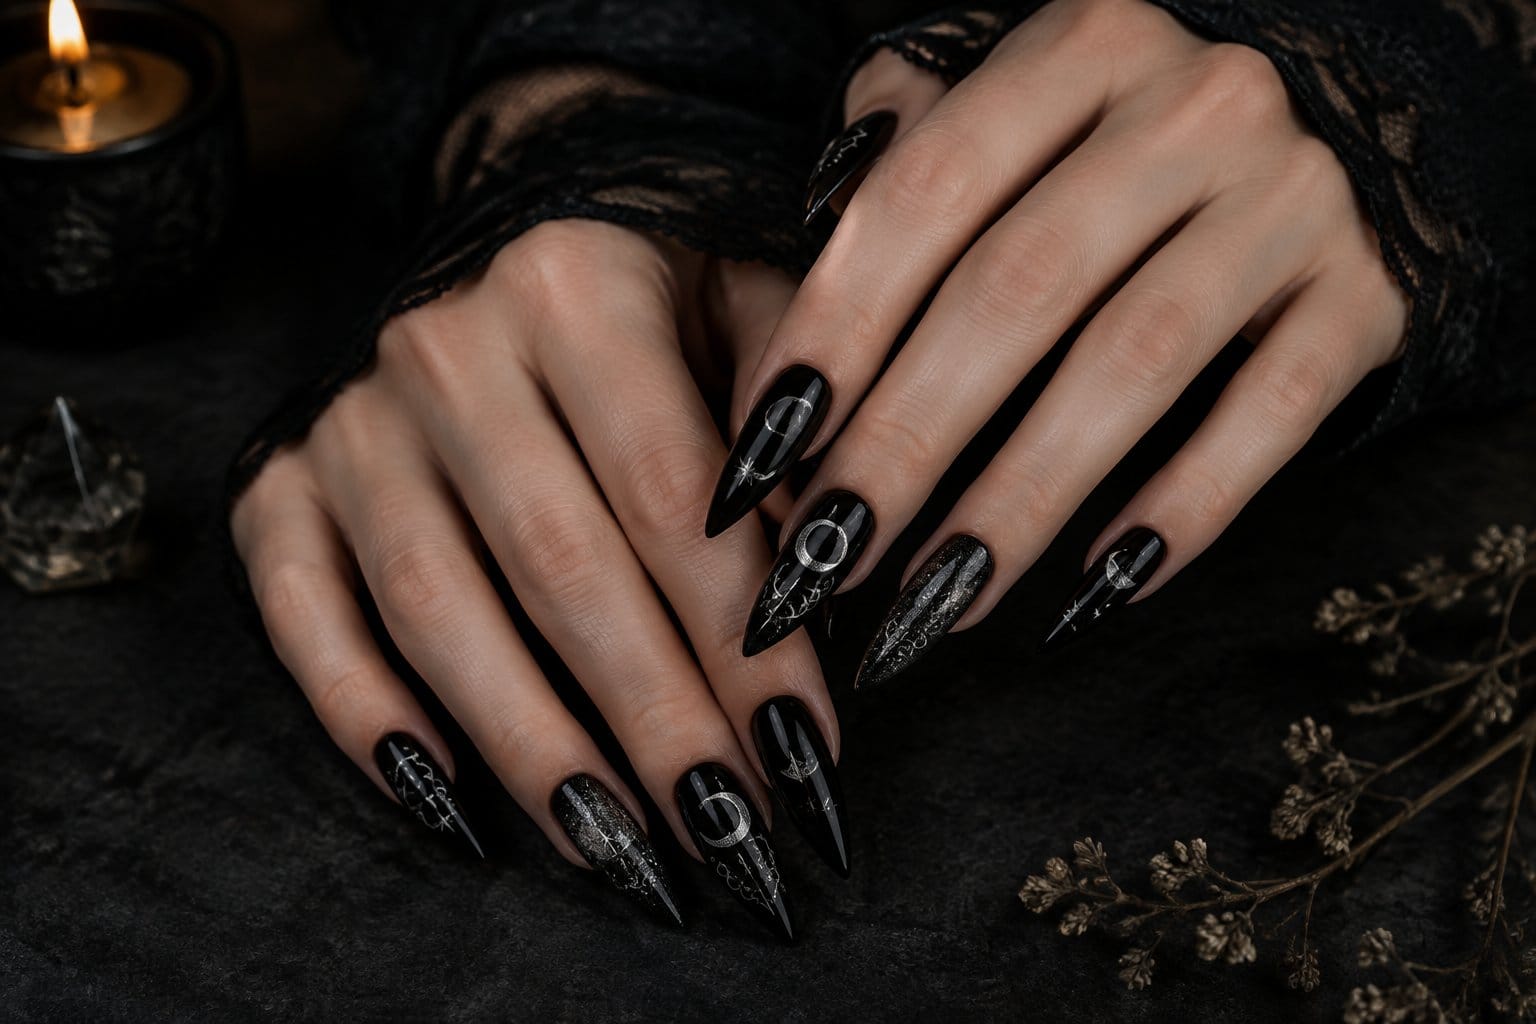
If you want one witchy manicure that suits almost anyone, go with short or almond black nails and one simple silver accent, like a crescent moon or a few stars. It’s easy to do at home, it grows out politely, and it still looks intentional at work. The dramatic options below (tarot art, crystal balls, serpents) are where a skilled nail artist earns their fee.
Every look below comes with its shape, finish, accent colors, and motif. You’ll also get a straight answer on how hard it is, so you know which ones you can paint on the couch and which ones to screenshot and bring to your nail tech. Pick the one that feels most like you, save it, and book that appointment or grab your polish tonight.
1) Matte Black Stilettos with Silver Moon Phases
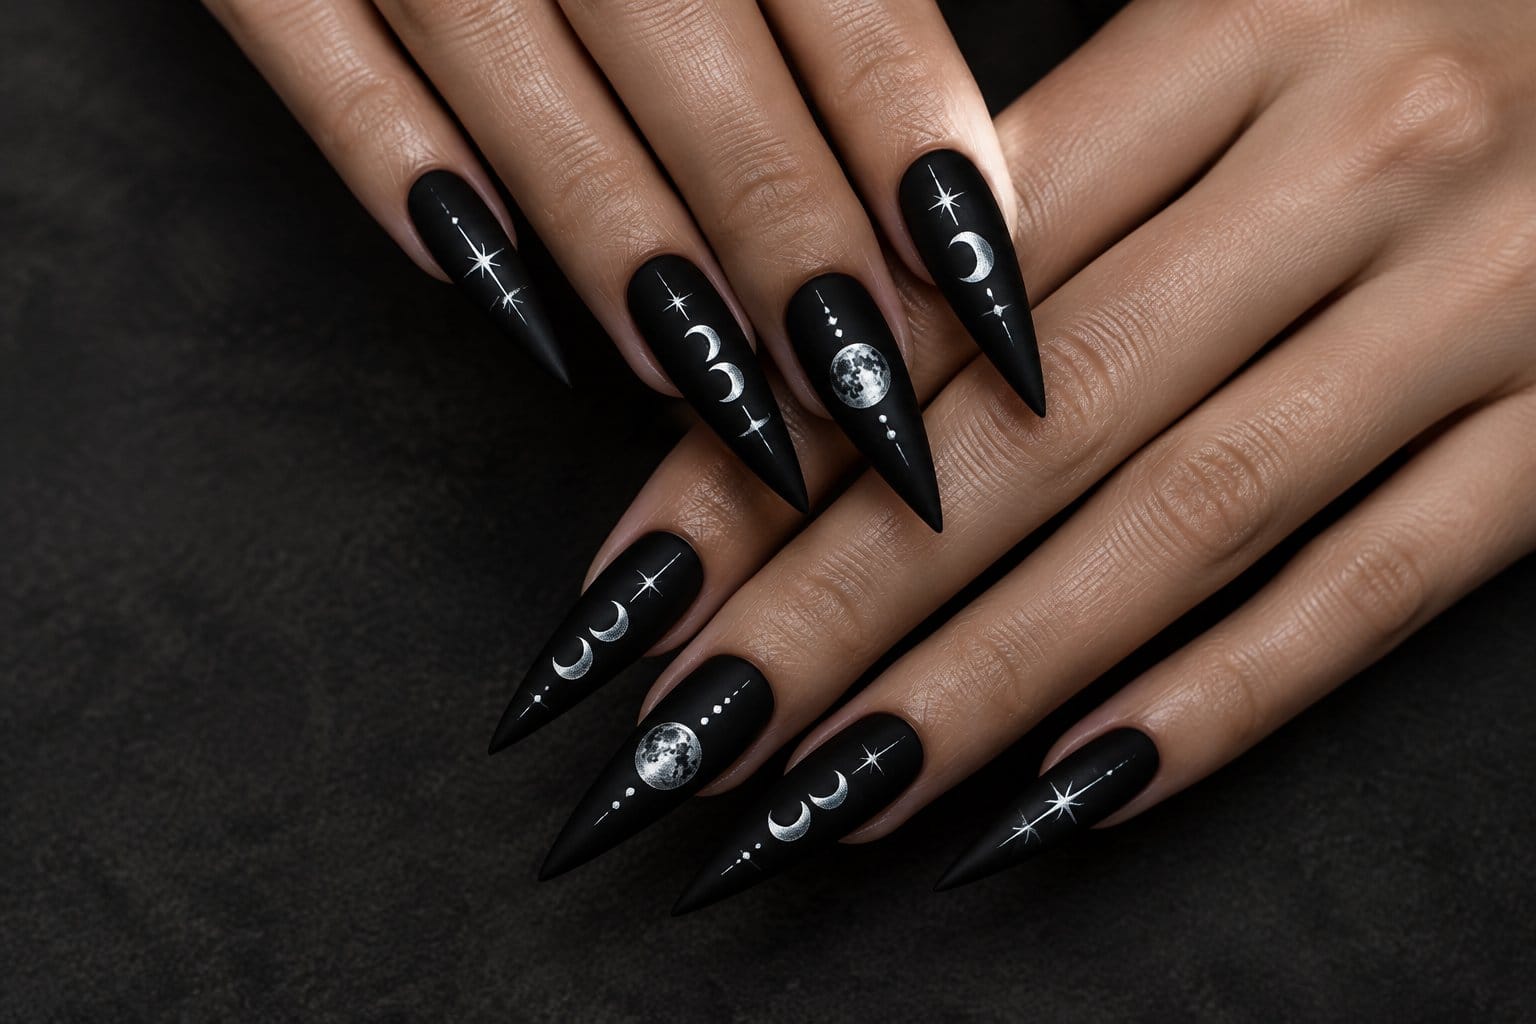
This is the classic witchy statement set, and it earns the spot. Long stiletto points plus a matte black base look sharp and a little dangerous. A row of silver moon phases running across your fingers, from new moon to full, turns your hands into a lunar calendar.
The details:
- Shape: Stiletto, medium to long
- Finish: Matte top coat over black
- Accents: Silver chrome or metallic silver polish
- Motif: One moon phase per nail, in order
The matte finish makes the silver pop. A glossy base would compete with the metal. If you want the moons to shine, ask for a glossy top coat on the moons only.
Difficulty: Salon-level if you want acrylic or gel stilettos. Painting clean circles and crescents on a narrow, pointed nail takes a steady hand. At home, silver moon stickers or nail decals get you most of the way there.
Stilettos are long and pointy, so expect a few awkward moments with buttons and keyboards. If that sounds annoying, the next look is your friend.
2) Short Black Nails with Tiny Crescent Moons
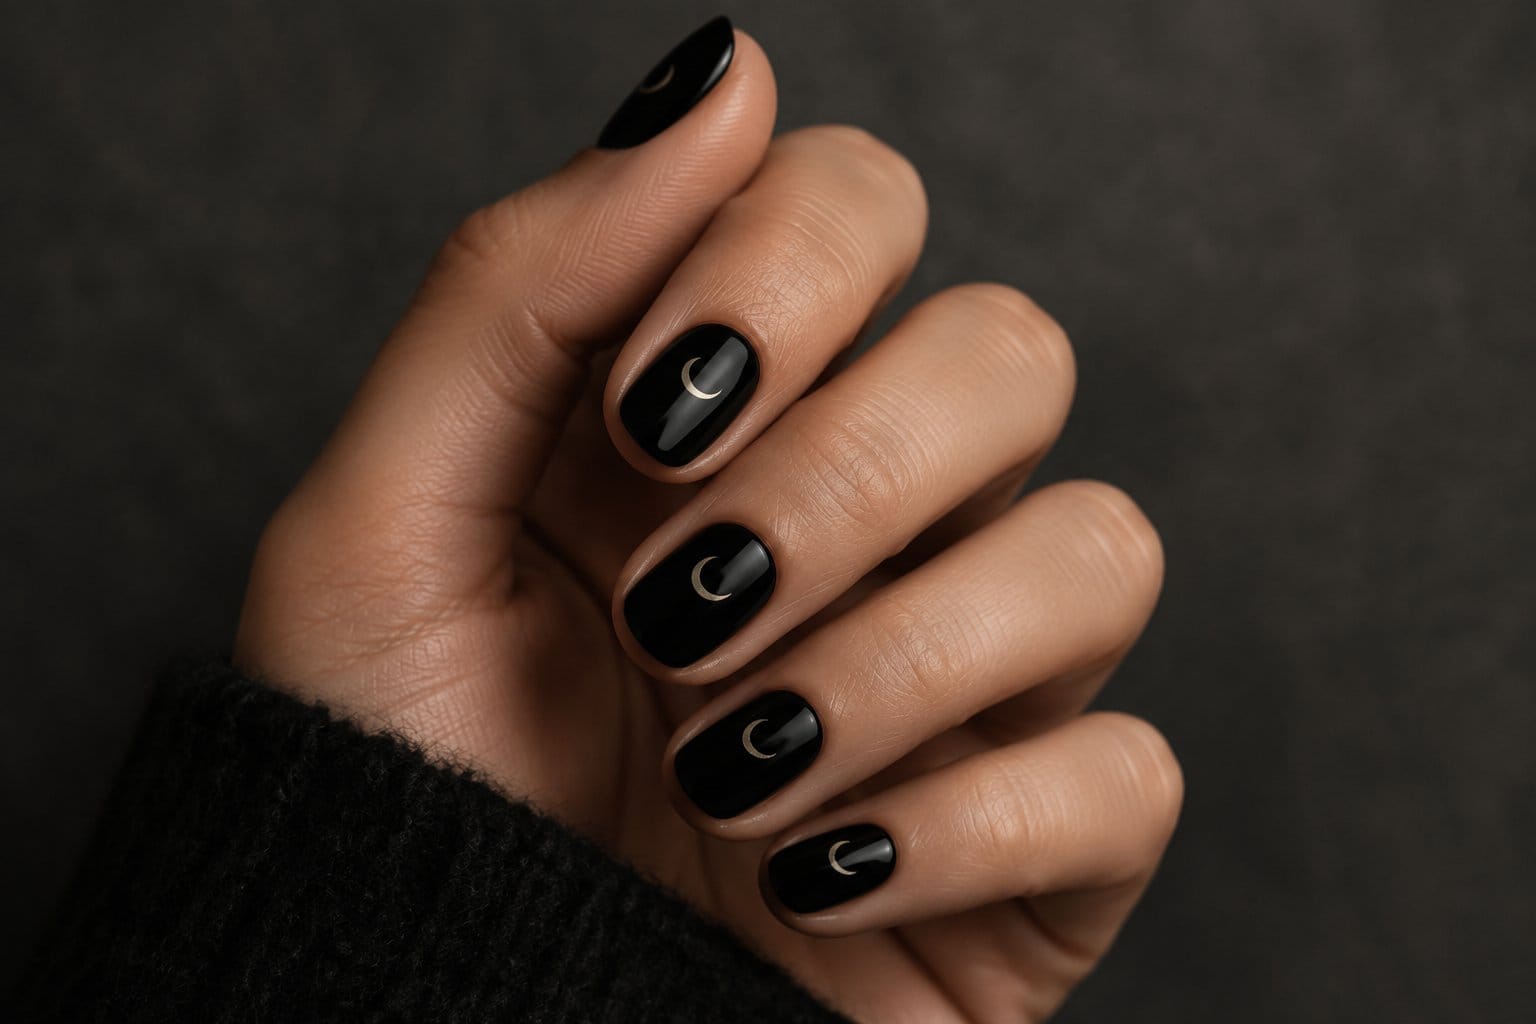
Short nails can be every bit as witchy as long ones. This look keeps your nails at fingertip length, painted glossy black, with one tiny crescent moon near the cuticle or tip of each nail.
The details:
- Shape: Short round or squoval
- Finish: High-gloss
- Accents: Gold or silver
- Motif: A single small crescent per nail, or on just two accent nails
This is the best beginner design on the list. A crescent is two curved strokes with a fine detail brush. You can also cheat with a dotting tool: make a dot, then place a slightly smaller dot of black over one side. Instant moon.
Difficulty: Easy at home. Mistakes are tiny and easy to fix with a black touch-up.
It also passes most dress codes. If you work in healthcare or food service, short natural nails are often required anyway, so this gives you a witchy look that stays within the rules.
3) Black Coffin Nails with Hand-Painted Tarot Cards
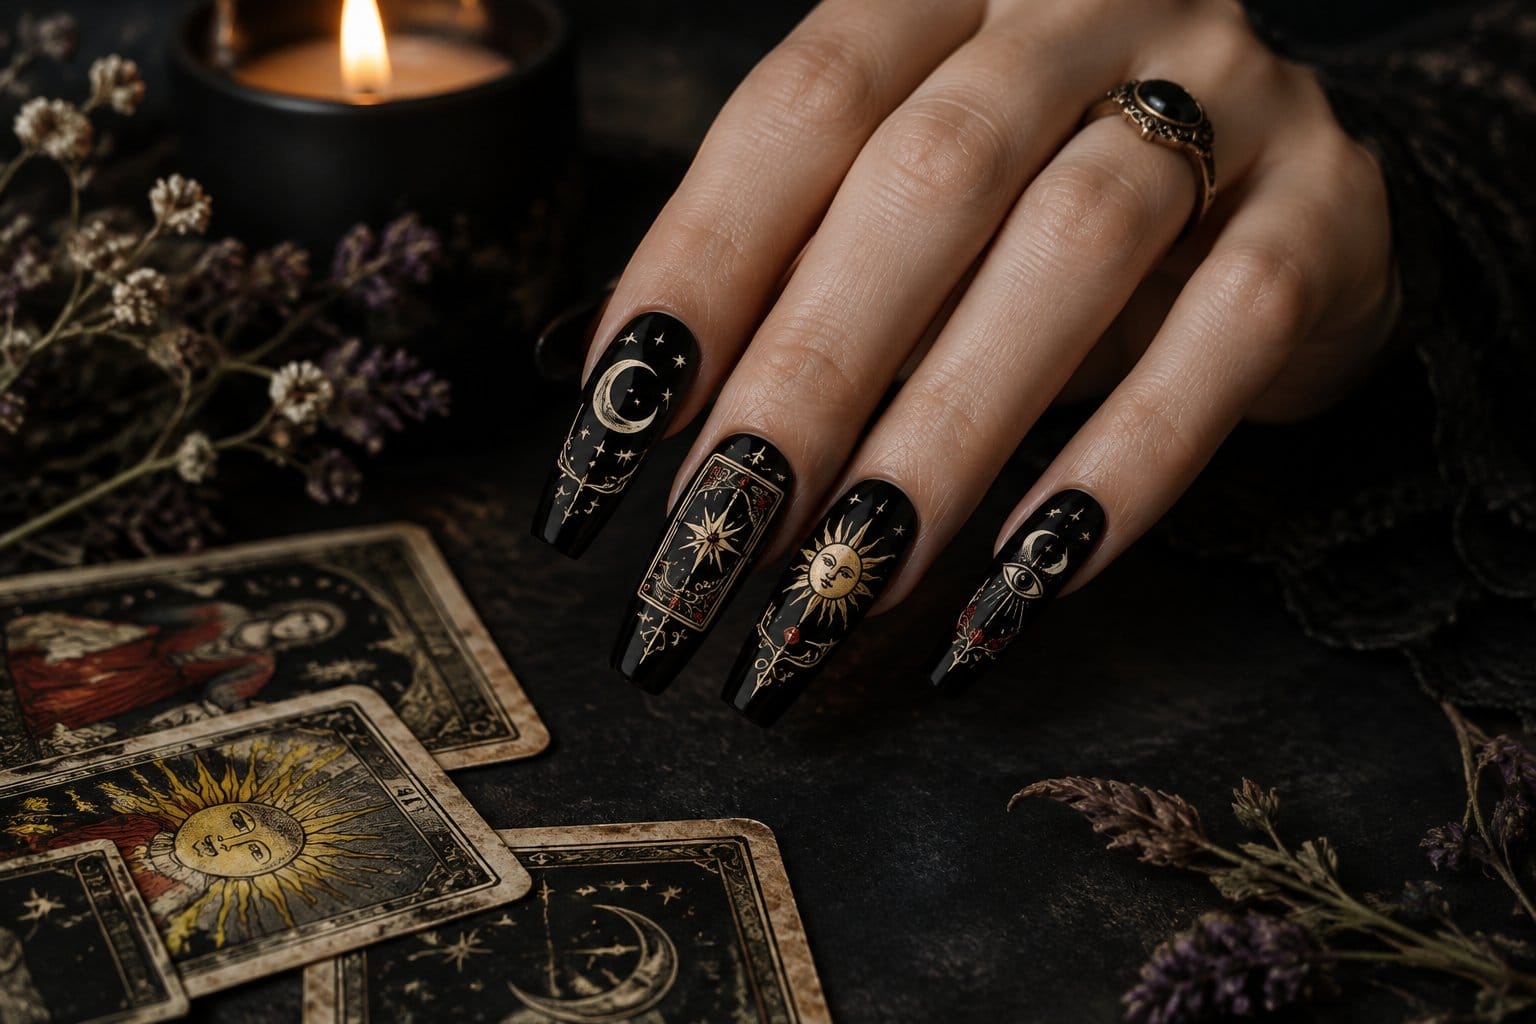
Coffin nails have a flat, wide tip, which makes them the perfect little canvas for tarot art. Each accent nail gets a mini card, like The Moon, The Sun, or The Star, framed in gold on a black base.
The details:
- Shape: Coffin, medium to long
- Finish: Glossy black with a clear top coat over the art
- Accents: Gold, cream, and muted blue or red
- Motif: Two or three tarot “cards,” with plain black on the rest
The flat coffin tip gives the artist room for a border and a symbol. On a round nail, the card would get squished.
Difficulty: Leave this one to a nail artist. Tiny faces, stars, and framed borders take serious skill and time, so plan for a longer appointment. At home, tarot-style nail decals give you a simpler version.
If your whole vibe runs on tarot, you’ll already know how good this looks next to tarot card wall decor with sun, moon, and star prints.
4) Glossy Black Nails with Silver Stars
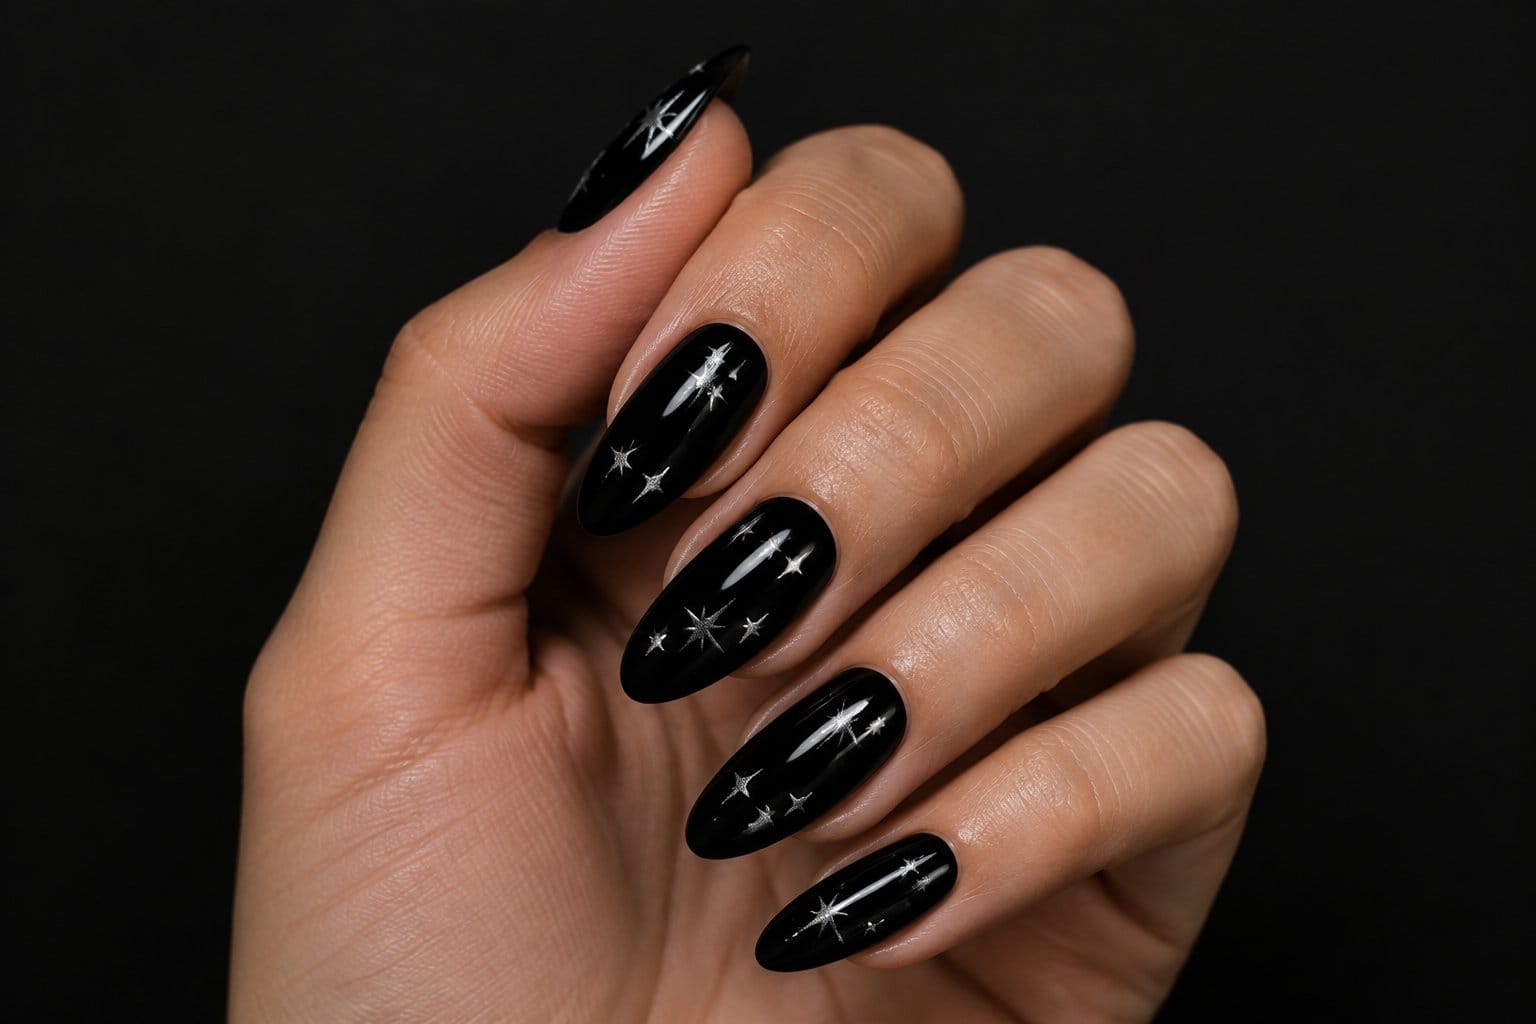
Scattered silver stars on shiny black look like a clear night sky, and you can do this on any shape. The trick is mixing sizes: a few bigger stars with tiny dots around them looks natural and random.
The details:
- Shape: Any; almond and oval look especially pretty
- Finish: Super glossy
- Accents: Silver foil, silver polish, or small silver star studs
- Motif: Four-point or five-point stars plus dotted “dust”
Four-point stars are easier to paint than five-point ones. Just make a small plus sign and pinch the center with thin strokes. Add a few dots with a dotting tool and you’re done.
Difficulty: Easy to medium. Star stickers or metal nail studs make it even faster. Studs add texture, but they can snag on sweaters, so keep them near the cuticle.
For extra depth, sponge a hint of navy or deep purple into one corner of the black before adding stars. It reads like a galaxy without going full rainbow.
5) Black French Tips with Spiderweb Lace
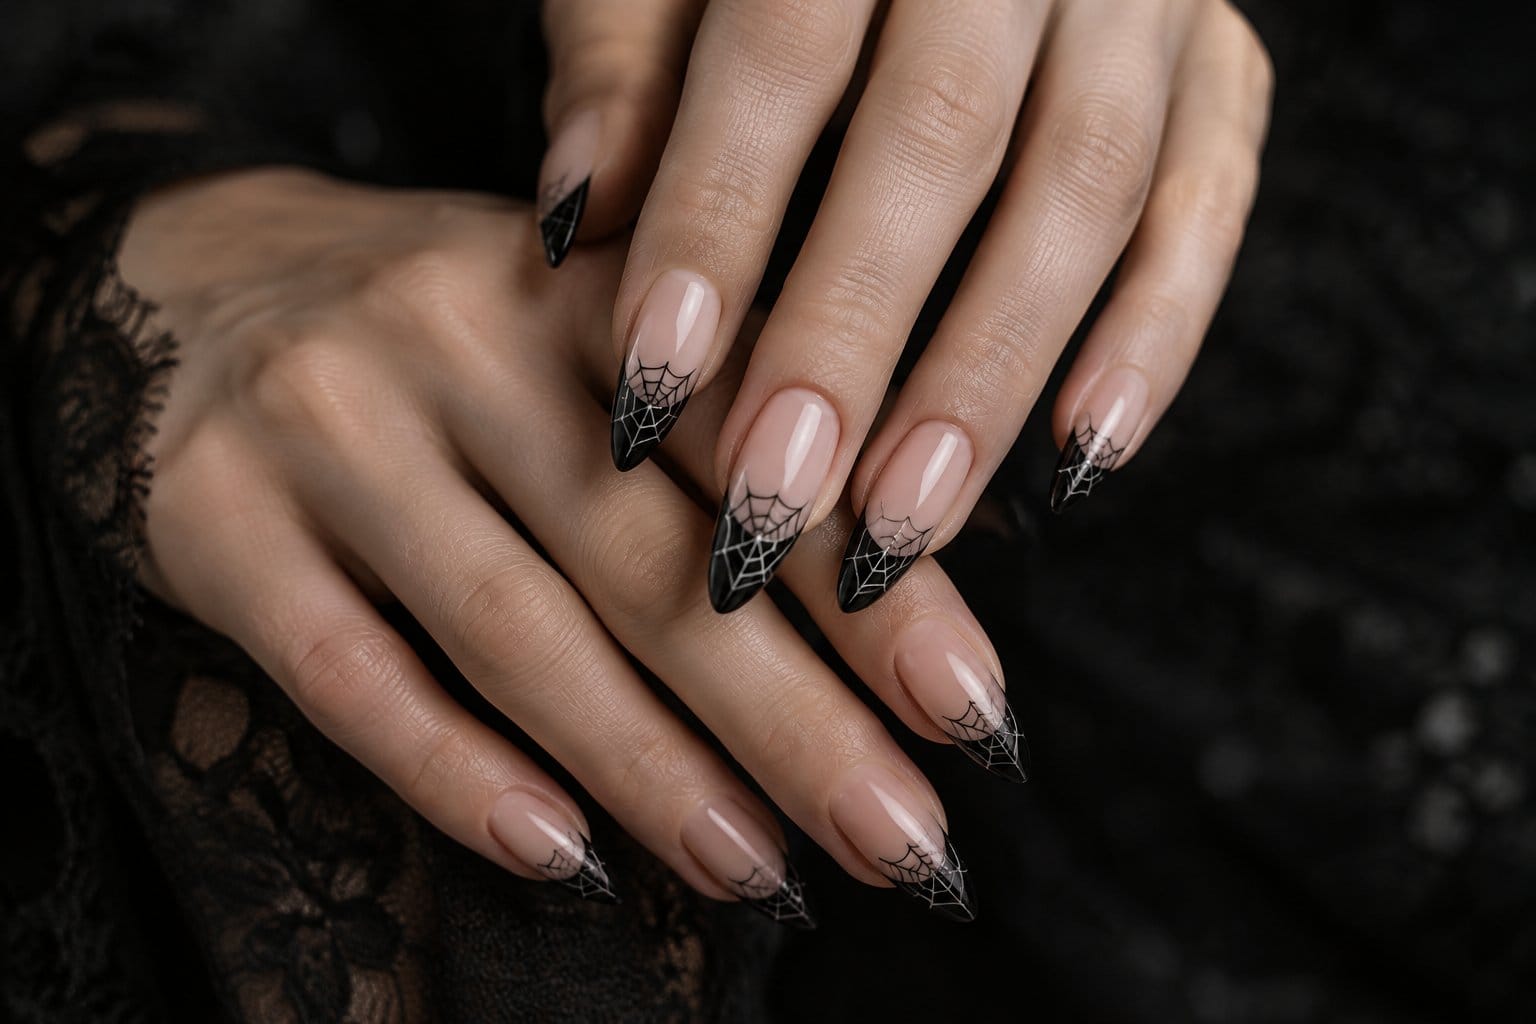
A black French tip is the gateway goth manicure. You keep a sheer nude or milky base and swap the white tip for black. Then fine black lines stretch from the tip down into the nude base, like a spiderweb or a piece of lace.
The details:
- Shape: Almond or square
- Finish: Glossy
- Accents: Black only, or add a tiny silver spider on one nail
- Motif: Web lines or lacy scallops
It’s softer than full black, so it works well if you want a subtle witchy look. The web pattern also pairs nicely with sheer black lace fingerless gloves for a costume or a Victorian-inspired outfit.
Difficulty: Medium. The French tip itself takes practice; tip guides or a thin brush help. The web lines need a long, skinny striper brush. Draw the straight “spokes” first, then connect them with small curved lines.
If you’re decorating for spooky season anyway, match your nails to your stretchy spider web Halloween decorations and call it a theme.
6) Black-to-Plum Smoky Ombré Nails
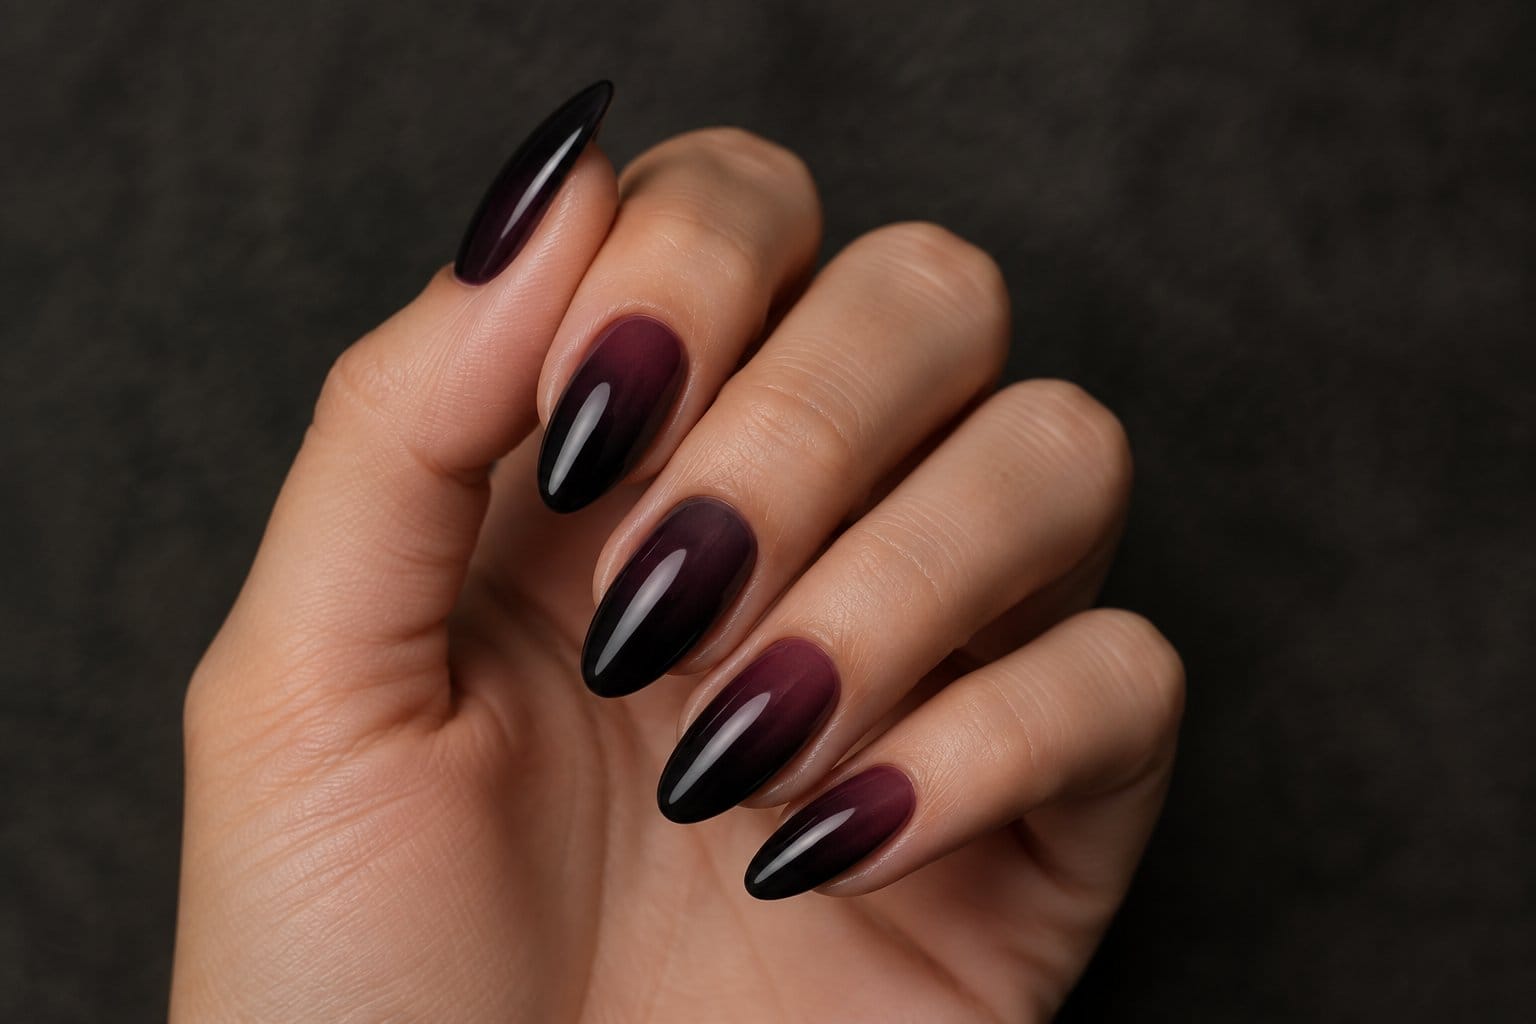
A smoky fade from deep plum at the cuticle to black at the tip looks moody and rich. It’s a great pick if you love dark nails but want something softer than solid black.
The details:
- Shape: Almond, oval, or coffin
- Finish: Glossy for a jewel look, matte for a velvety one
- Accents: Plum, eggplant, or wine
- Motif: A smooth gradient, no symbols needed
You can do this at home with a makeup sponge. One common method is to paint both colors side by side on a cosmetic sponge, dab it onto the nail, and repeat until you like the coverage, as shown in these step-by-step ombré nail instructions. Finish with a top coat to smooth out the grainy texture.
Difficulty: Easy to medium. It gets messy, so paint liquid latex or tape around your fingers first. Cleanup with a small brush dipped in remover takes care of the rest.
Want a little magic? Add one tiny silver moon on your ring finger.
7) Black Marble Nails with Gold Veins
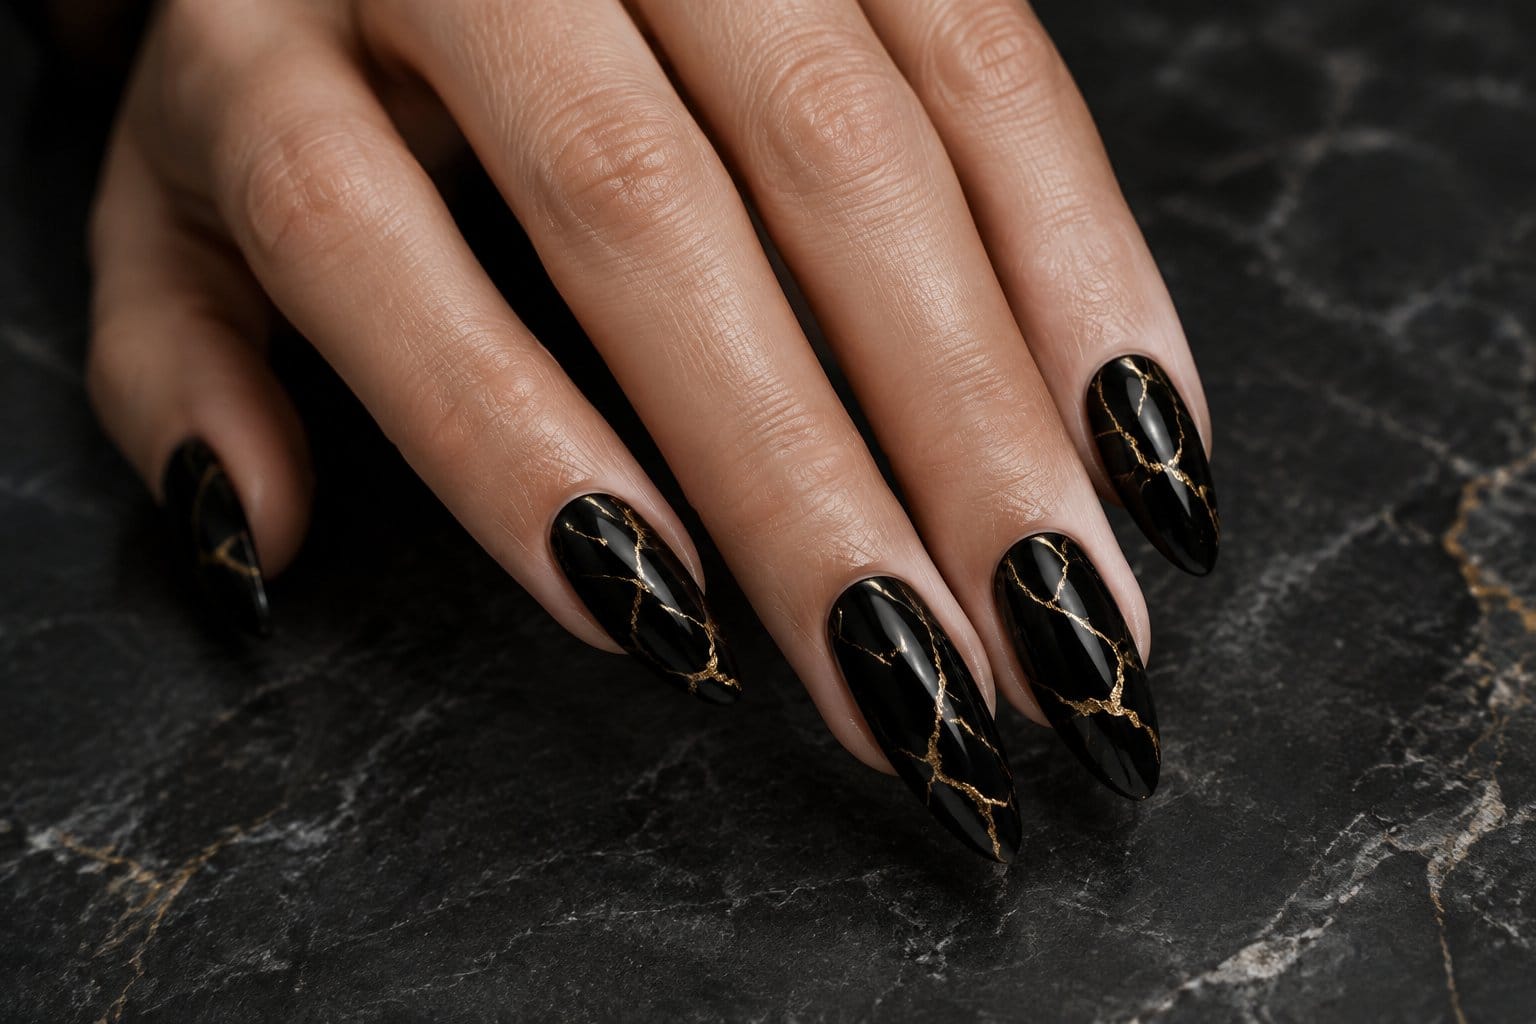
Black marble with gold veining looks expensive and a little ancient, like the floor of a witch’s library. It’s a strong choice when you want something dark and fancy without obvious Halloween symbols.
The details:
- Shape: Square, coffin, or almond
- Finish: Glossy, to look like polished stone
- Accents: Gold foil, gold leaf, or metallic gold polish
- Motif: Thin, uneven veins; add soft grey smoke for depth
Real marble veins are never perfectly straight. Wiggle the brush a little and let lines branch off each other. Gold foil flakes pressed into tacky top coat look great too, and they hide shaky lines.
Difficulty: Medium at home. The foil method is forgiving. Salon versions use gel and blooming techniques that make the smoky grey spread softly, which is hard to fake with regular polish.
Keep the veins on two or three nails if you want a cleaner look, and leave the rest solid black.
8) Iridescent Black Chrome Almond Nails
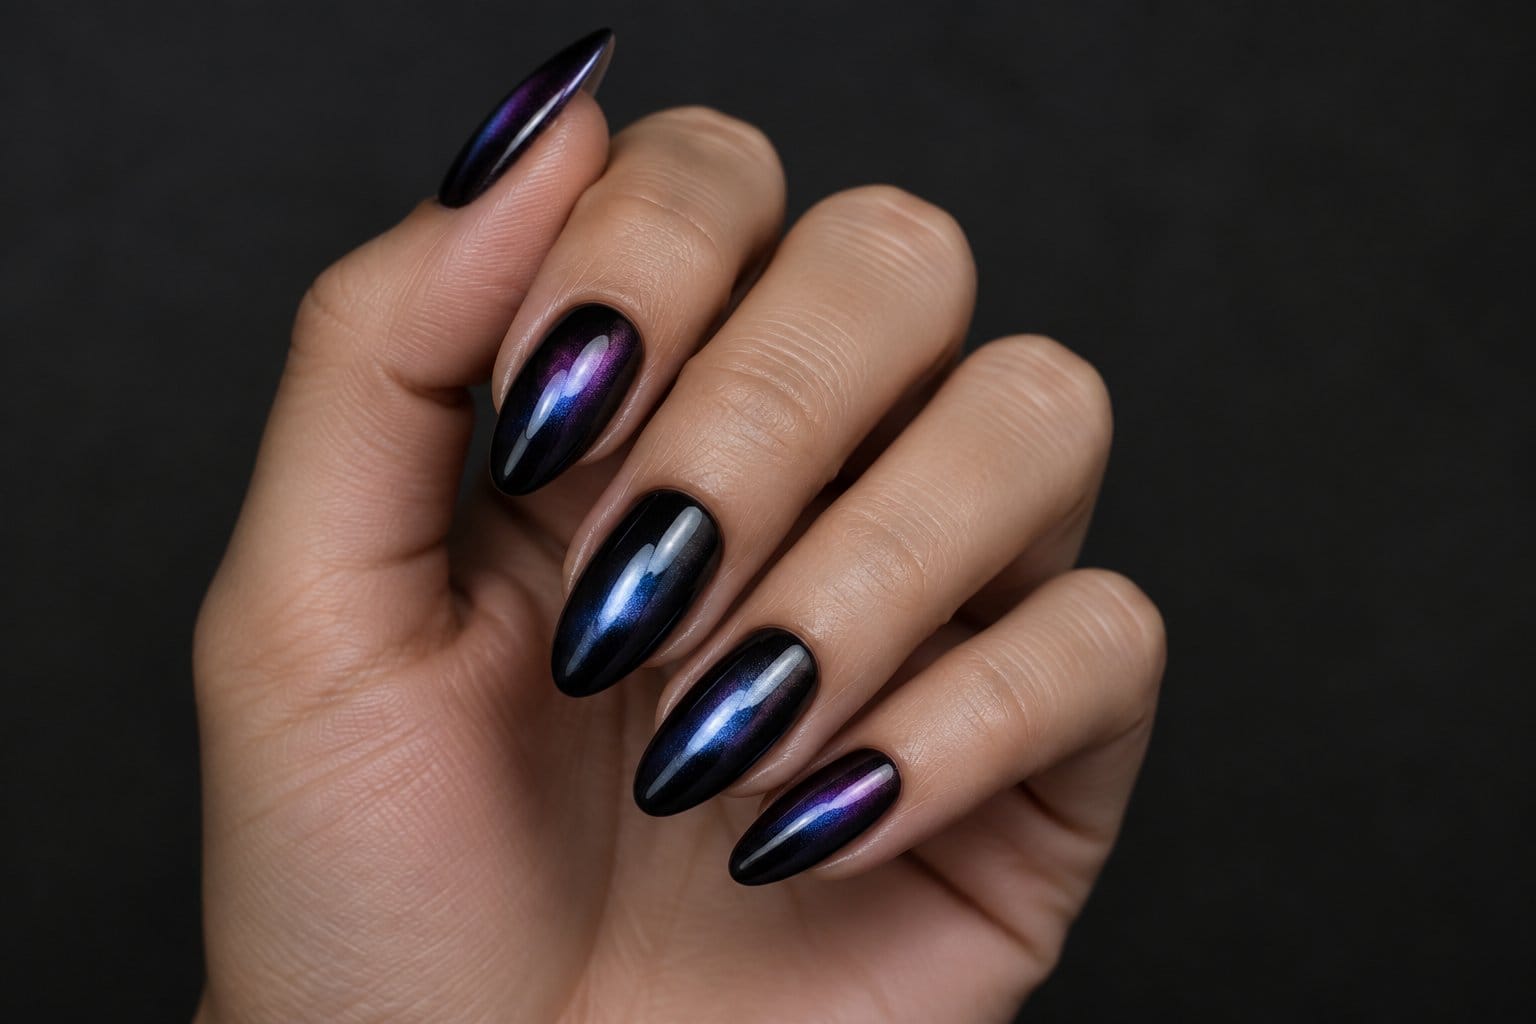
Chrome powder over black gel gives you a mirror shine that shifts colors, like beetle wings or an oil slick. Almond shape makes it look sleek and elegant.
The details:
- Shape: Almond, medium to long
- Finish: Mirror chrome
- Accents: Purple, green, or blue shift, depending on the powder
- Motif: None needed; the shine is the design
No painting skill required, which is the fun part. The texture does all the work.
Difficulty: Mostly a salon look. Chrome powder needs a gel base and a no-wipe gel top coat cured under a lamp. If you already own a gel setup, you can try it at home. If not, goth press-on nails in medium almond with silver chrome details give you the effect without any equipment.
Chrome shows every bump, so the base coat needs to be smooth.
9) Matte Black Nails with White Witch Symbols
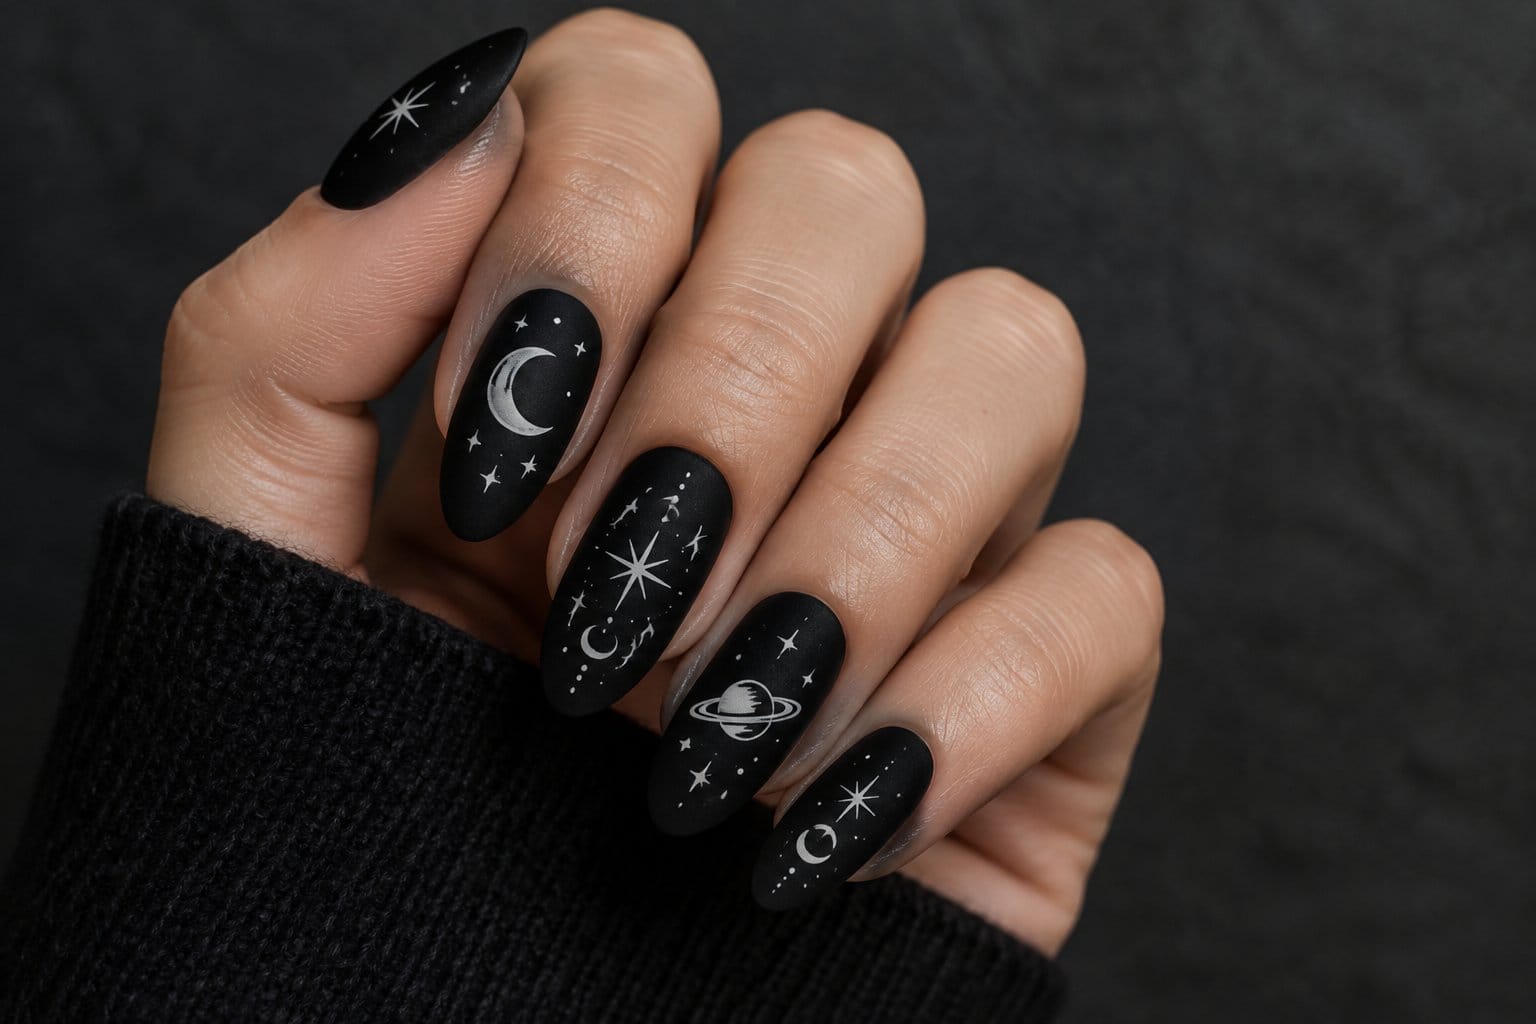
White line art on matte black looks like chalk on a blackboard, or a page from an old spellbook. Think small moons, stars, eyes, sparkles, and simple sigil-like shapes.
The details:
- Shape: Short square to medium almond
- Finish: Matte
- Accents: Bright white
- Motif: A different small symbol on each nail
The high contrast makes even simple doodles look bold. This is also a nice upgrade from the moon-and-star parade, since you can add an all-seeing eye, a planet with rings, or tiny dots in a triangle.
Difficulty: Medium. White polish can streak. Use a white nail art pen or a thick white gel liner for cleaner lines. Put a matte top coat on first, then add the white art, then dab matte top coat over the art only. That keeps the lines from smearing.
10) Black Nails with Red Dripping Tips
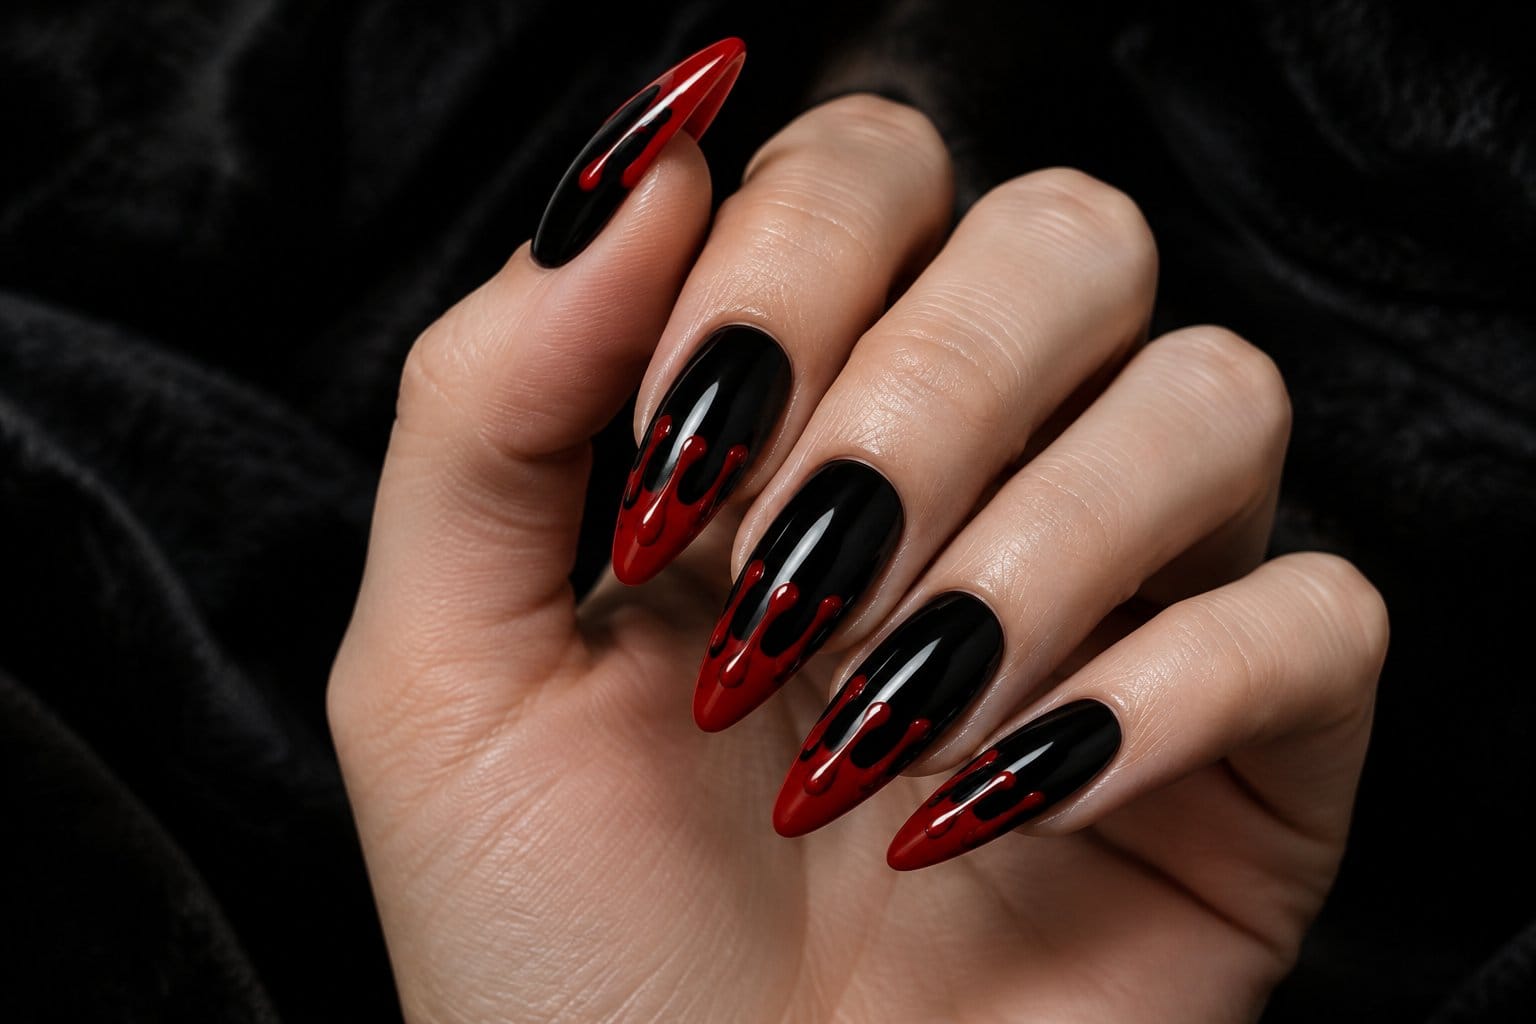
Red drips running down from the tips of black nails are pure horror movie. They’re a little campy, a lot fun, and perfect for Halloween parties.
The details:
- Shape: Almond, coffin, or stiletto
- Finish: High-gloss, so the red looks wet
- Accents: Blood red or deep cherry
- Motif: Drips of different lengths
To paint it, sweep red across the tip, then pull a few drips down with a small brush and end each one in a round blob. A dotting tool makes perfect blob ends. Vary the length so it looks natural.
Difficulty: Easy to medium. A thick gel top coat makes the drips look raised and glossy, which sells the effect.
Go subtle by putting drips on one or two nails only. Go all in by adding a tiny silver fang on your thumb.
11) Black Cat-Eye Nails with a Magnetic Silver Shift
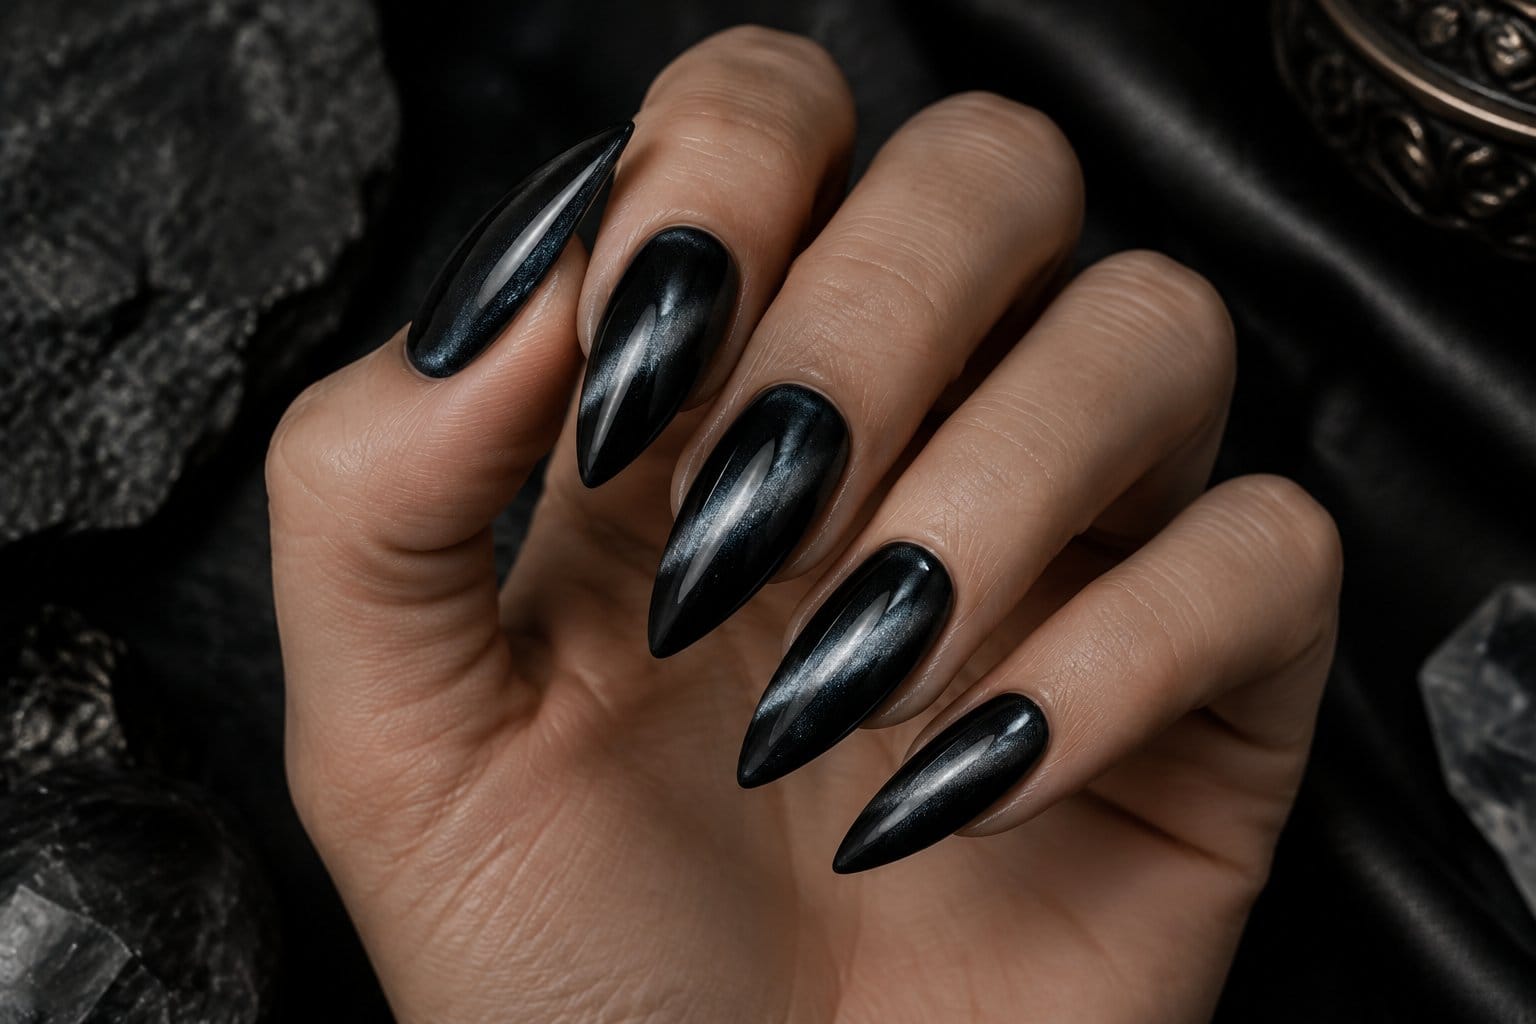
Cat-eye polish has tiny metal particles inside it. When you hold a magnet over wet polish, the shimmer gathers into a glowing stripe that moves as you turn your hand. On black, it looks like moonlight hitting glass.
The details:
- Shape: Any, but oval and almond show the stripe best
- Finish: Glossy
- Accents: Silver shimmer
- Motif: A center stripe, diagonal line, or soft “velvet” glow
Difficulty: Easier than it looks. You need a magnetic polish and a nail magnet, which most brands sell together. The main trick is speed: hold the magnet close for a few seconds before the polish dries or cures.
Both regular lacquer and gel versions exist. Gel versions often look deeper and more 3D because you cure them right after placing the stripe.
This is a great option for anyone who wants texture and motion with zero painting.
12) Black Nails with Emerald Serpent Accents
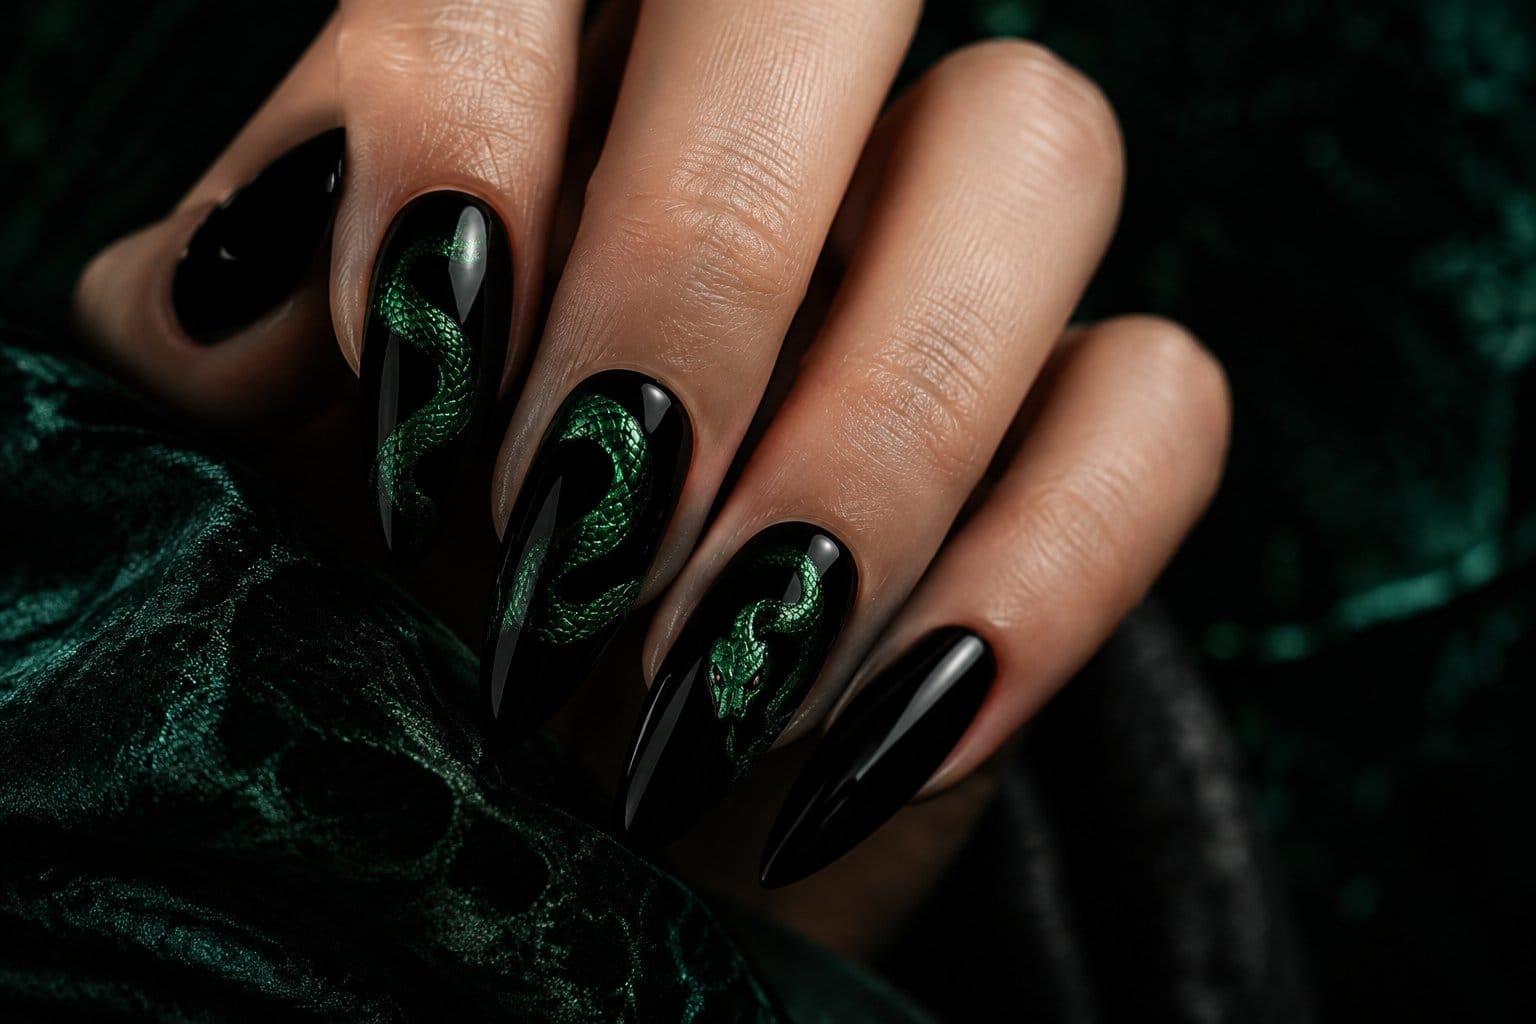
Snakes are an old symbol of change and rebirth, and an emerald serpent wrapping around a black nail looks both witchy and luxe.
The details:
- Shape: Coffin or almond, medium to long
- Finish: Glossy black with green shimmer or chrome for the snake
- Accents: Emerald, gold scales, tiny rhinestone eyes
- Motif: One snake winding across one or two accent nails
The green brings color without breaking the dark mood. Gold outlines around the scales add a jewelry feel.
Difficulty: Nail artist territory. Curving a snake body across a nail and adding scale detail takes practice and time. A simple home version is a green wavy line with a small triangle head and two dots for eyes.
Pair it with emerald or green-shimmer polish on your other nails if you want a stronger green story.
13) Sheer Black Nails with Pressed-Flower Details
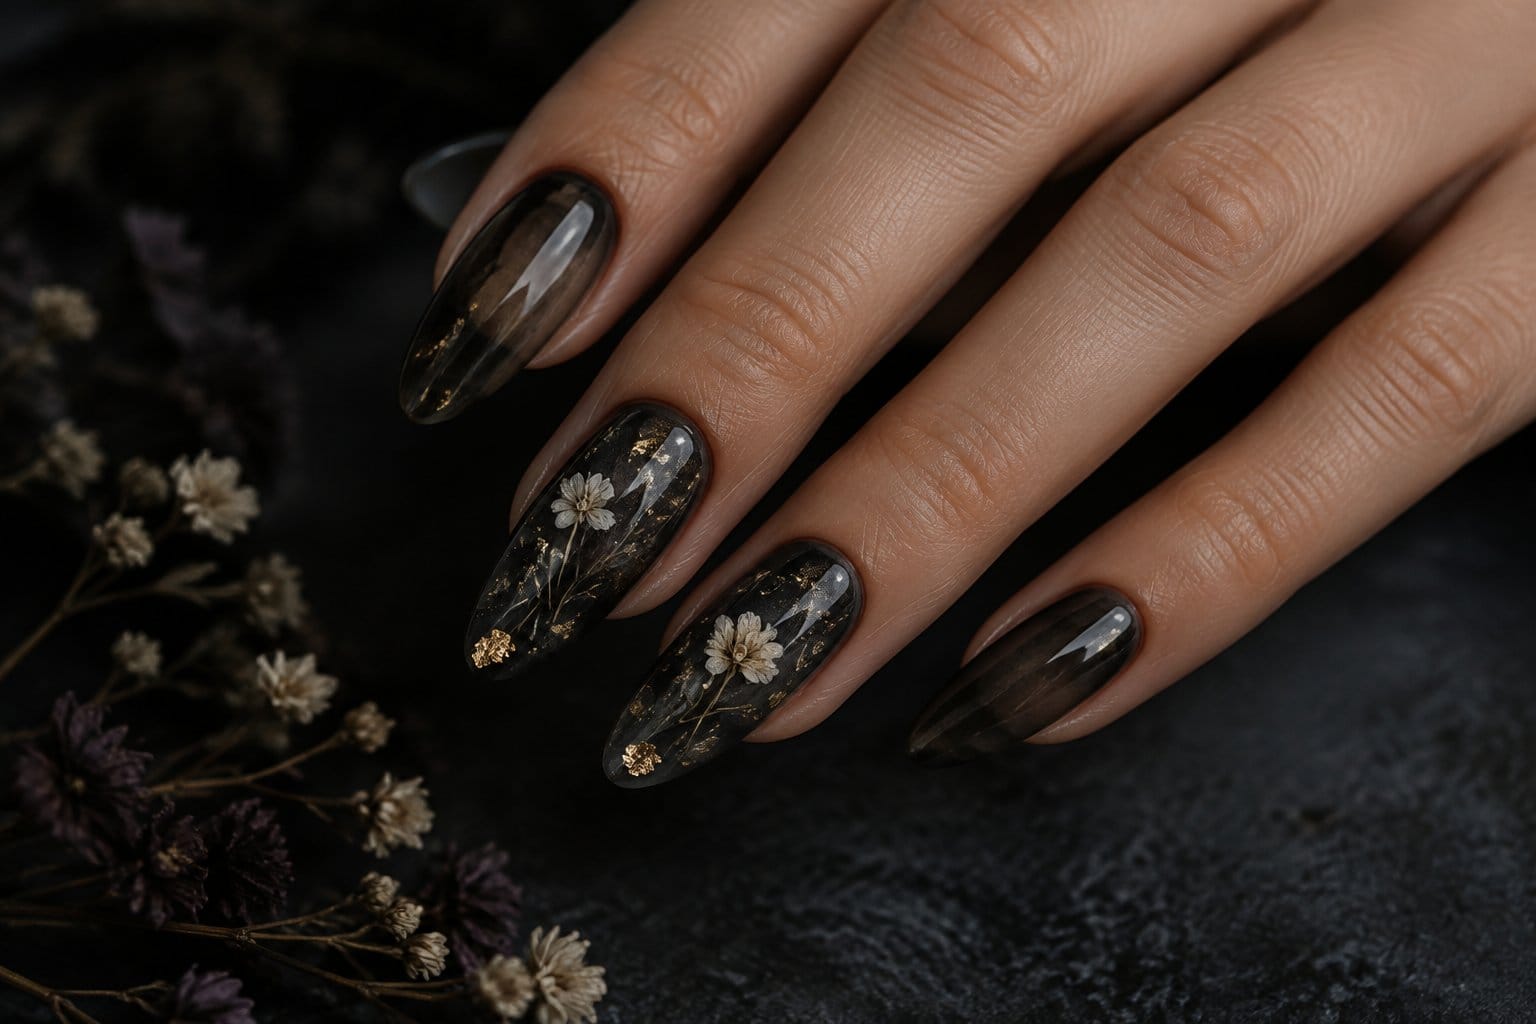
Sheer black, sometimes called “smoky” or “jelly” black, lets a bit of your natural nail show through. Tiny dried flowers sealed under the polish make it look like an herbal witch’s pressed-flower journal.
The details:
- Shape: Short to medium oval or almond
- Finish: Glossy
- Accents: Dried flowers in white, dusty pink, or deep red
- Motif: One or two flowers per accent nail
To get sheer black, mix a drop of black into clear top coat or buy a black jelly polish. Place the dried flowers with tweezers on a tacky layer, then seal with two coats of top coat so nothing sticks up.
Difficulty: Easy to medium. Buy flowers made for nail art, since they’re thin enough to lie flat. Thicker flowers make lumps.
It’s one of the prettiest options here, and it looks lovely year-round.
14) Black Velvet Nails with Gold Celestial Charms
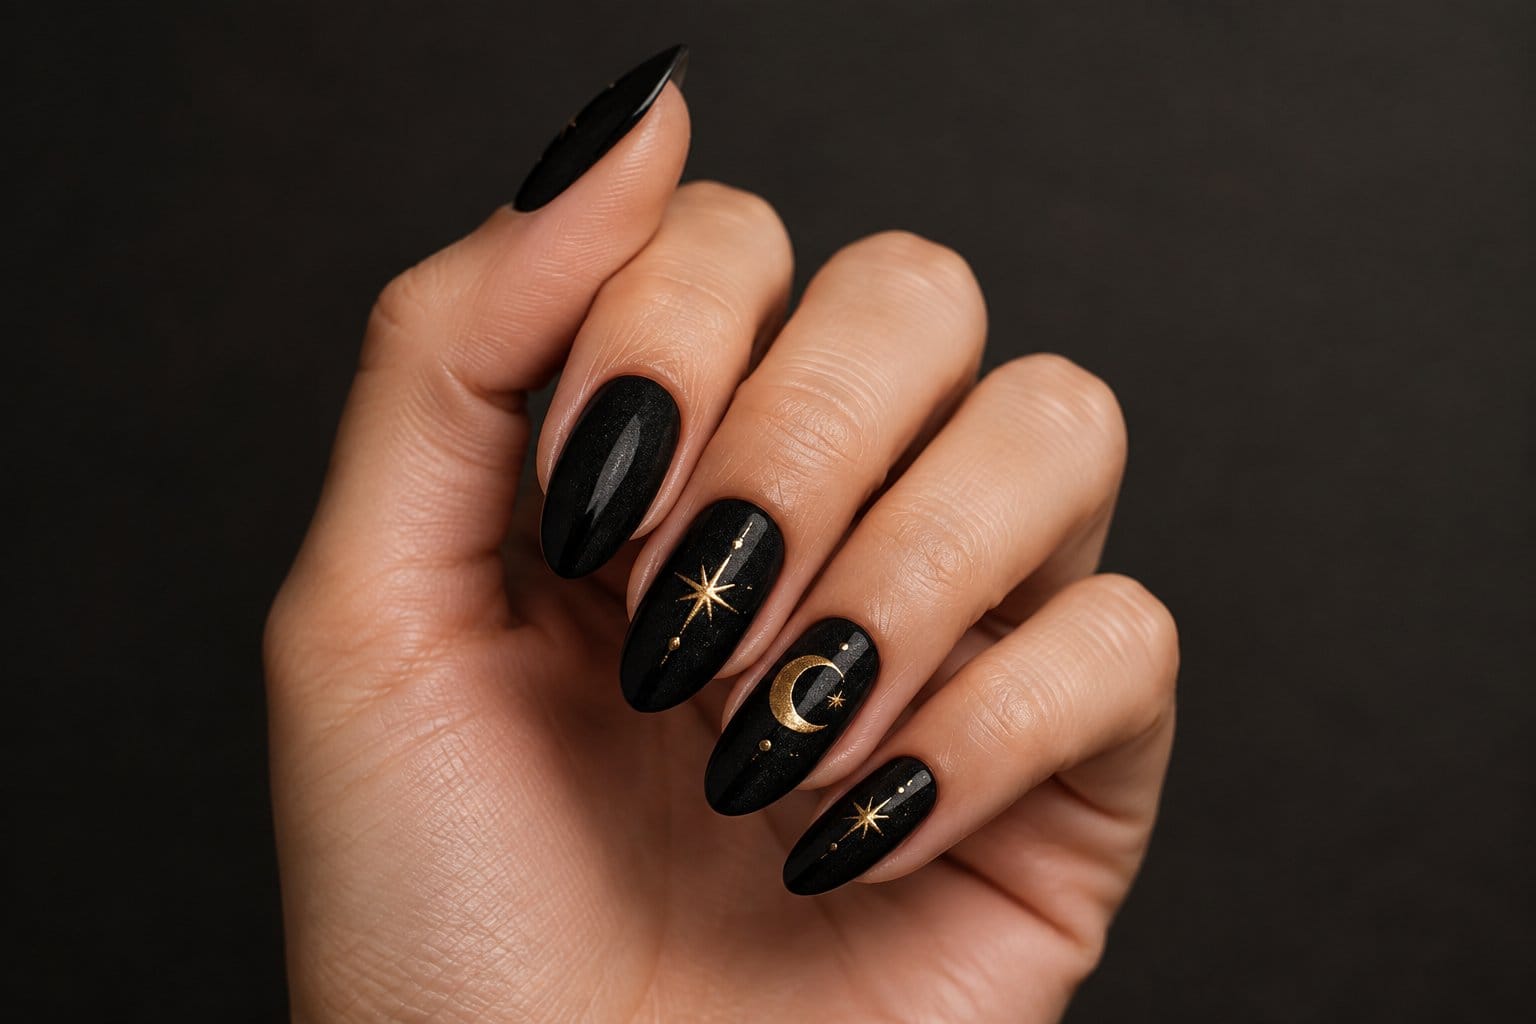
Velvet nails use a very fine magnetic shimmer spread across the whole nail. The result looks soft, like crushed velvet fabric. Add tiny gold moon and star charms and you’ve got a manicure that feels like a jewelry box.
The details:
- Shape: Almond or coffin
- Finish: Velvet shimmer with a glossy top
- Accents: Gold metal charms
- Motif: Small 3D moons and stars on two or three nails
The difference from the cat-eye look above is the spread. Velvet uses the magnet to scatter shimmer everywhere, while cat-eye pulls it into one stripe.
Difficulty: Medium. The velvet part is doable at home with magnetic polish. The charms need nail glue or a thick builder gel to stay put. Charms are the first thing to pop off, so put them away from the tip.
15) Black Nails with a Purple Crystal Ball Accent
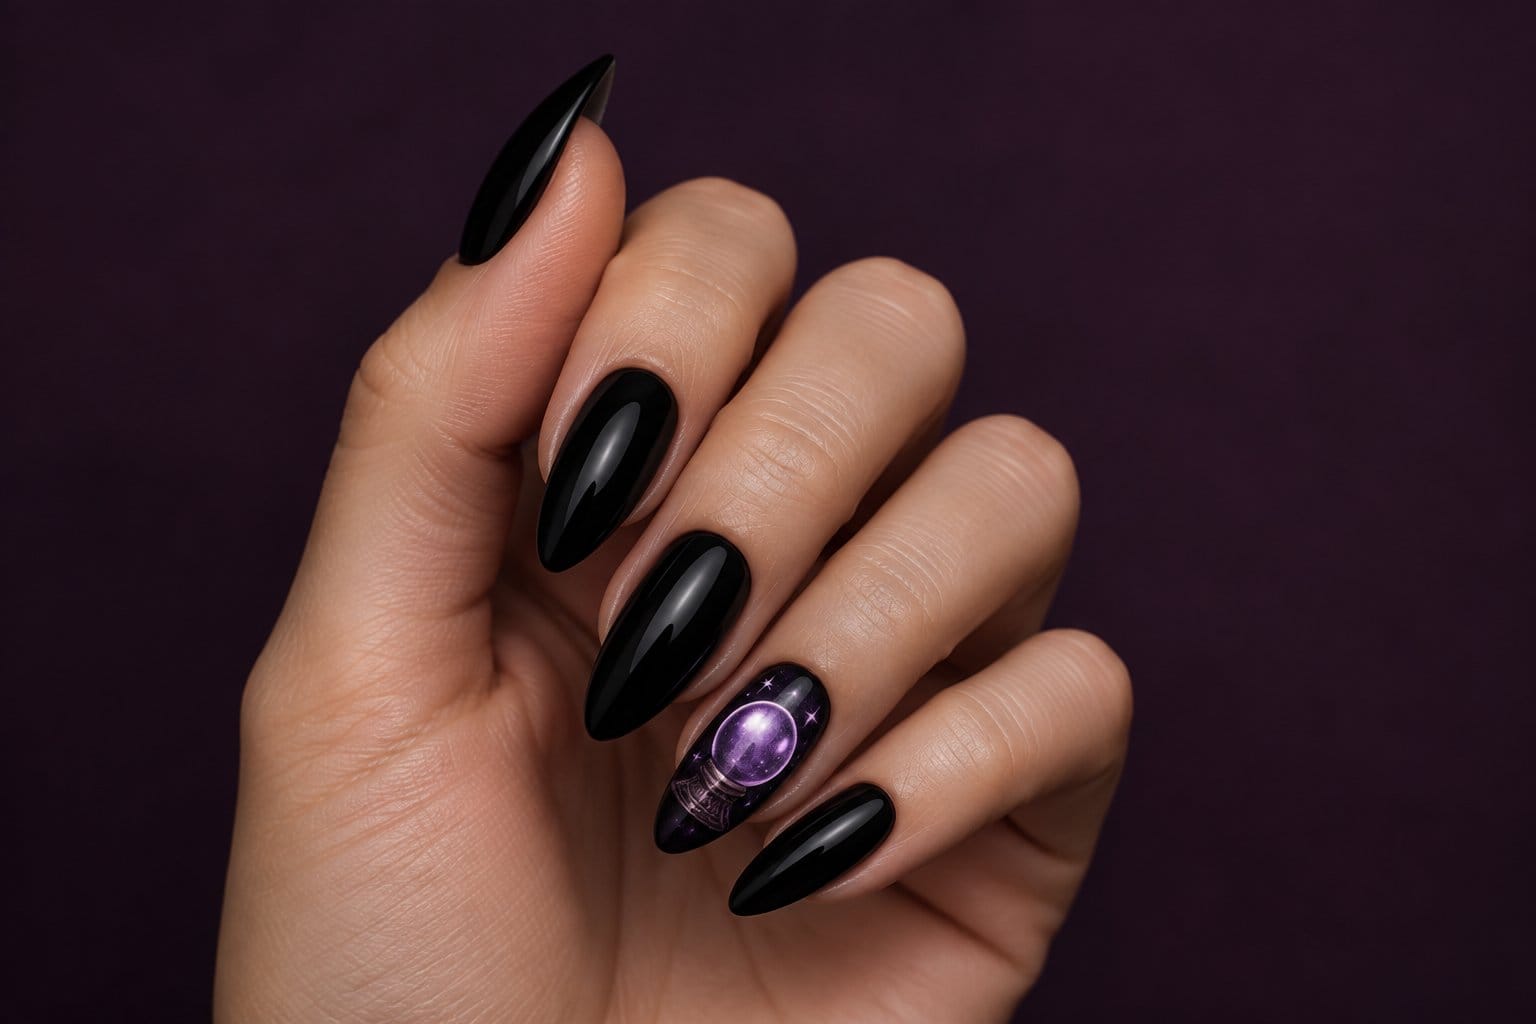
One accent nail with a glowing purple crystal ball, sitting on a tiny gold stand, is the fortune-teller manicure. Keep every other nail glossy black so the crystal ball gets all the attention.
The details:
- Shape: Coffin or square, for room to paint
- Finish: Glossy
- Accents: Purple, lavender, gold, and white highlights
- Motif: A round crystal ball with a swirl of mist inside
The white shine mark on the upper edge of the ball is what makes it look round and glassy. Skip it and it just looks like a purple circle.
Difficulty: Medium to hard. A home version is possible: paint a purple circle, sponge lighter purple in the center, add a white highlight, and paint a simple gold base. A nail artist adds shading and sparkle that are tough to copy.
Swap purple for teal or green if that suits your colors better.
16) Black Aura Nails with a Smoky Grey Center
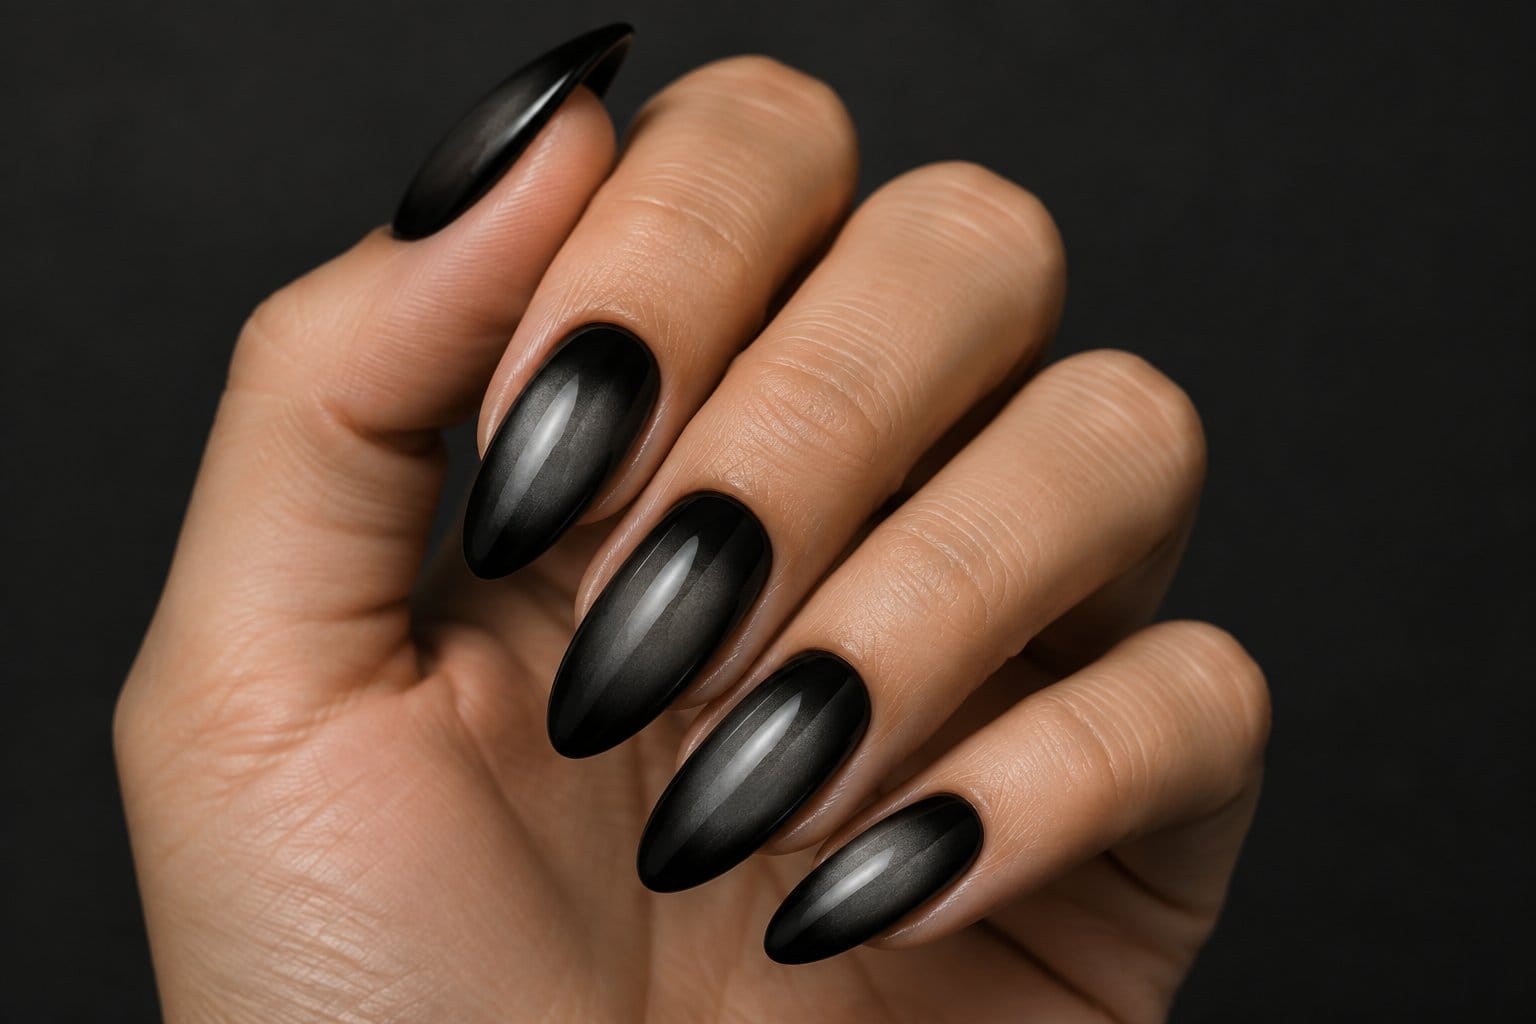
Aura nails have a soft blurred glow in the center that fades out to a darker edge. With smoky grey in the middle and black around it, it looks like a storm cloud or the mist inside a scrying glass.
The details:
- Shape: Short to medium almond or squoval
- Finish: Glossy or matte
- Accents: Charcoal, dove grey, or silver shimmer
- Motif: A blurry center glow
Difficulty: Salons create this with an airbrush, which gives the smoothest blur. At home, a small makeup sponge or even an eyeshadow sponge works. Paint grey on the sponge tip, dab it into the center of the black nail, and build slowly. Finish with a thick top coat to smooth things out.
This one is great for work and everyday wear because it’s moody but has no obvious symbols. Try a silver shimmer grey if you want a little extra glow.
17) Glossy Black Nails with Matte Gothic Filigree
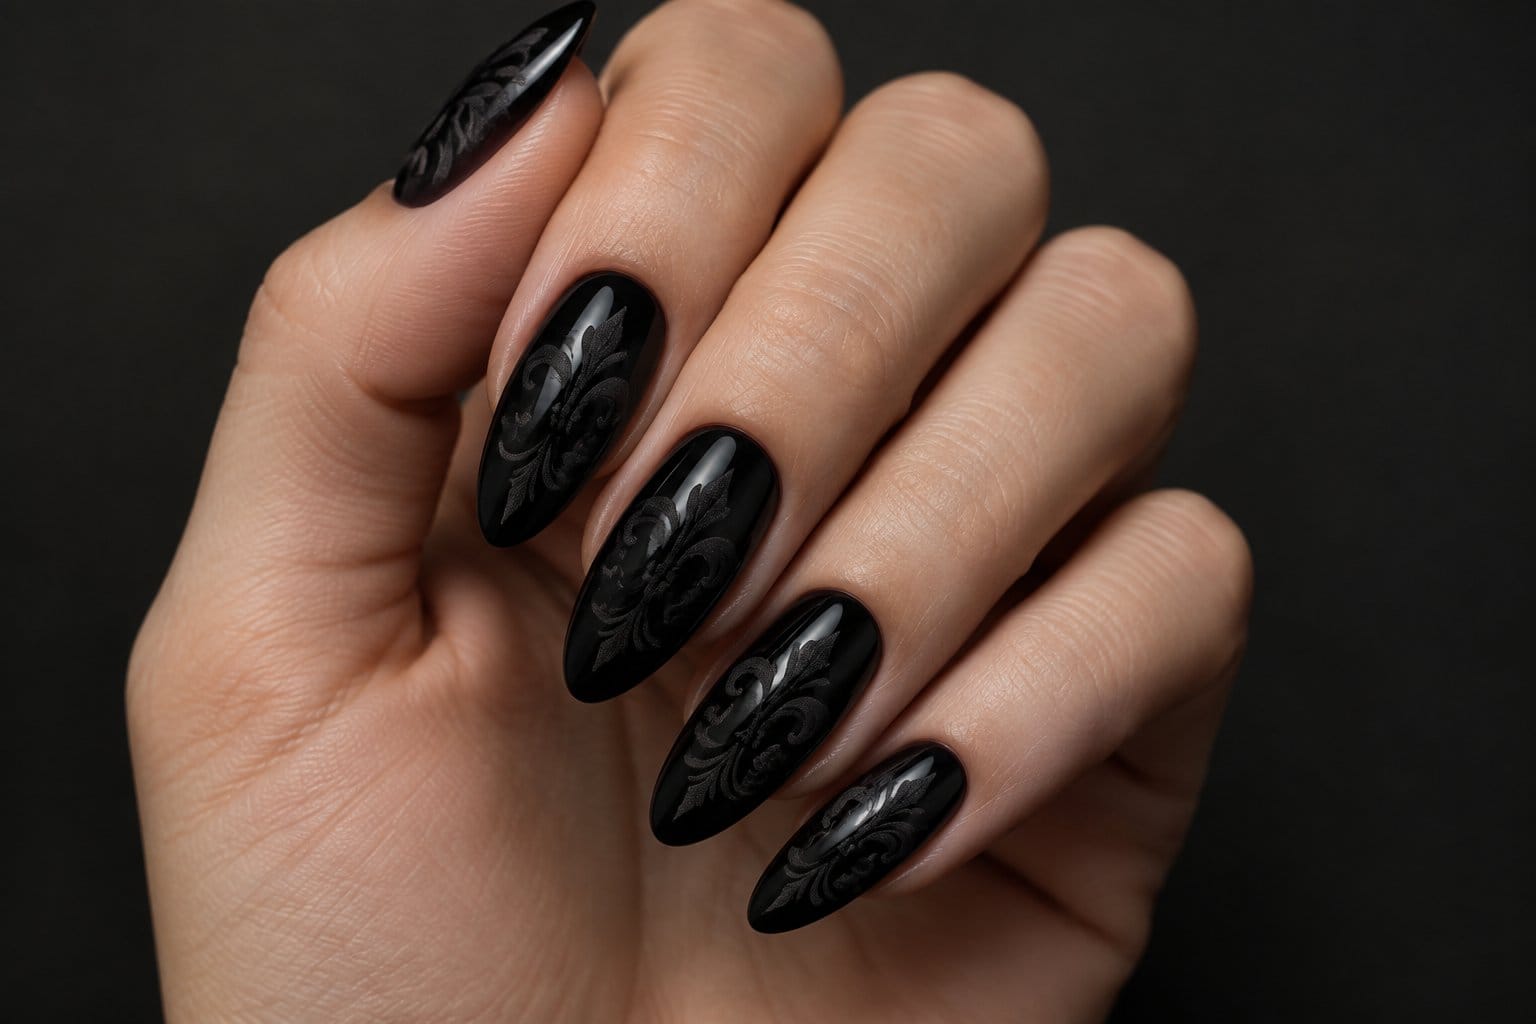
Black-on-black designs are the sneakiest witchy nails around. A glossy black base with a matte black swirl pattern on top only shows when the light hits it. It looks like iron gates or old cathedral carving.
The details:
- Shape: Long almond, coffin, or stiletto
- Finish: Glossy base, matte design
- Accents: All black
- Motif: Curling filigree, scrolls, or baroque swirls
Paint the whole nail black, add a glossy top coat, then paint the swirls with a matte top coat and a thin brush. The design is clear, so small mistakes almost vanish.
Difficulty: Medium. The pattern is forgiving, but the swirls take a steady hand.
If you love this vibe, check out our alt nails ideas for more dark designs.
18) Black Nails with Tiny Potion Bottle Art
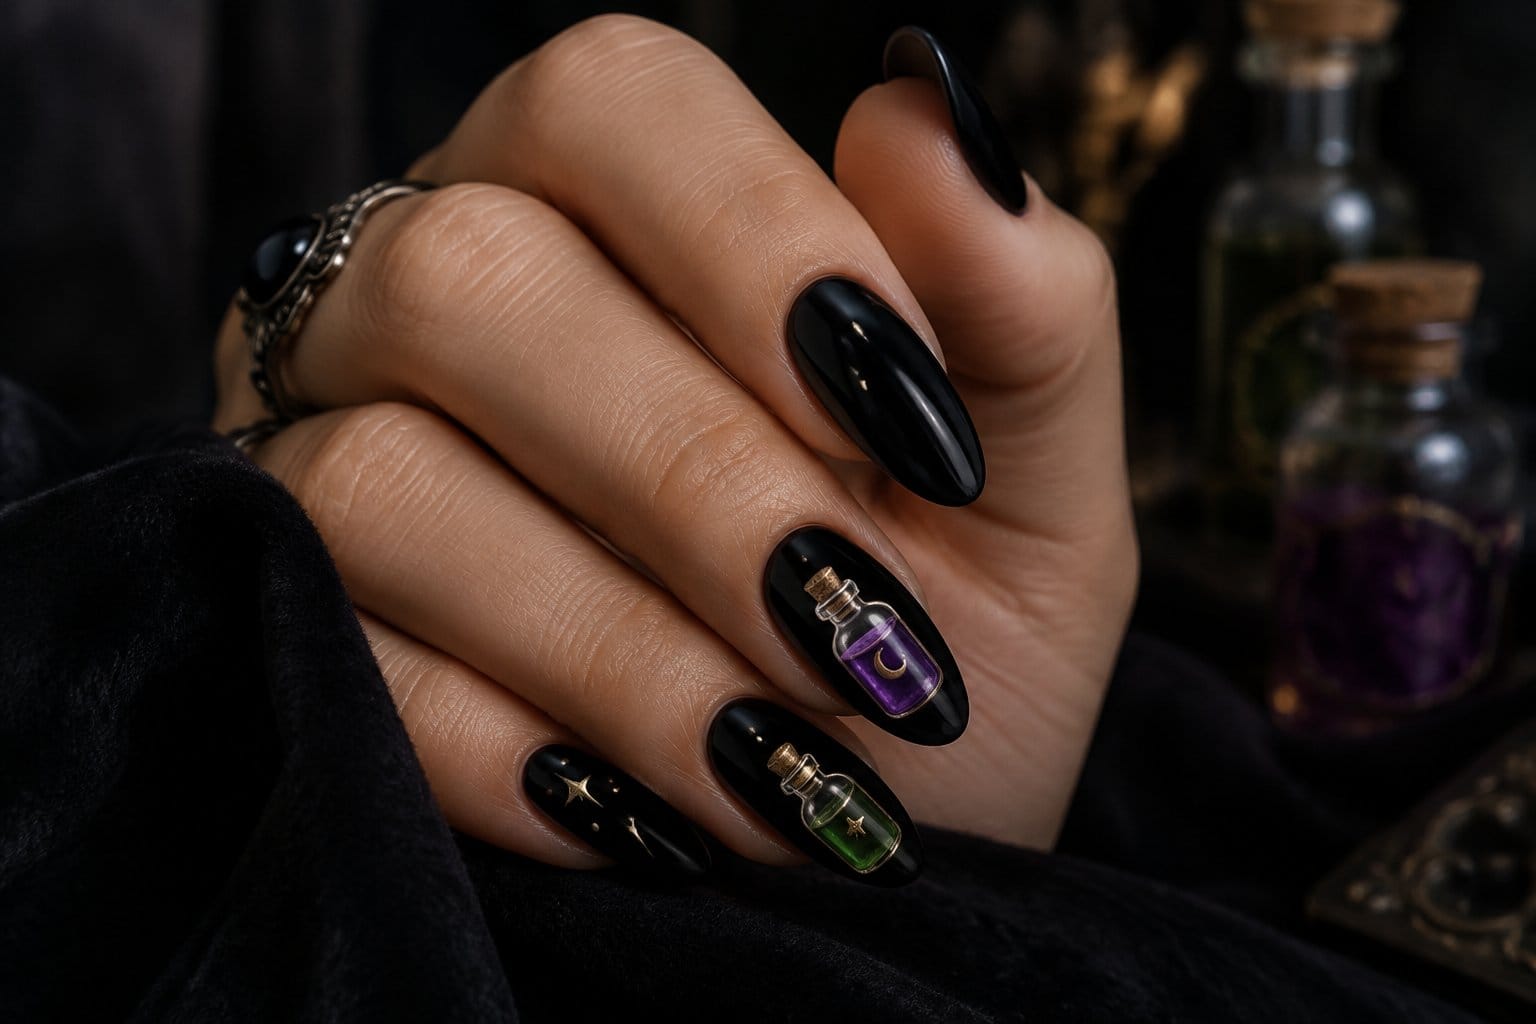
Tiny potion bottles, each filled with a different glowing liquid, make a playful witchy set. Picture a round flask with green bubbles on one nail and a skinny purple vial on another.
The details:
- Shape: Coffin or square, for more space
- Finish: Glossy
- Accents: Neon green, purple, pink, and white highlights
- Motif: Two to four different bottle shapes with cork tops and labels
The white highlight line on each bottle makes it look like glass.
Difficulty: Hard to do by hand, so this is one for a nail artist. The bottles are small, and each one needs an outline, liquid color, a cork, and shine marks. At home, stick to one simpler bottle on your ring finger, or use potion nail decals.
It’s a fun set for Halloween, a witchy book club, or a friend’s birthday.
19) Black and Silver Lightning Crack Nails
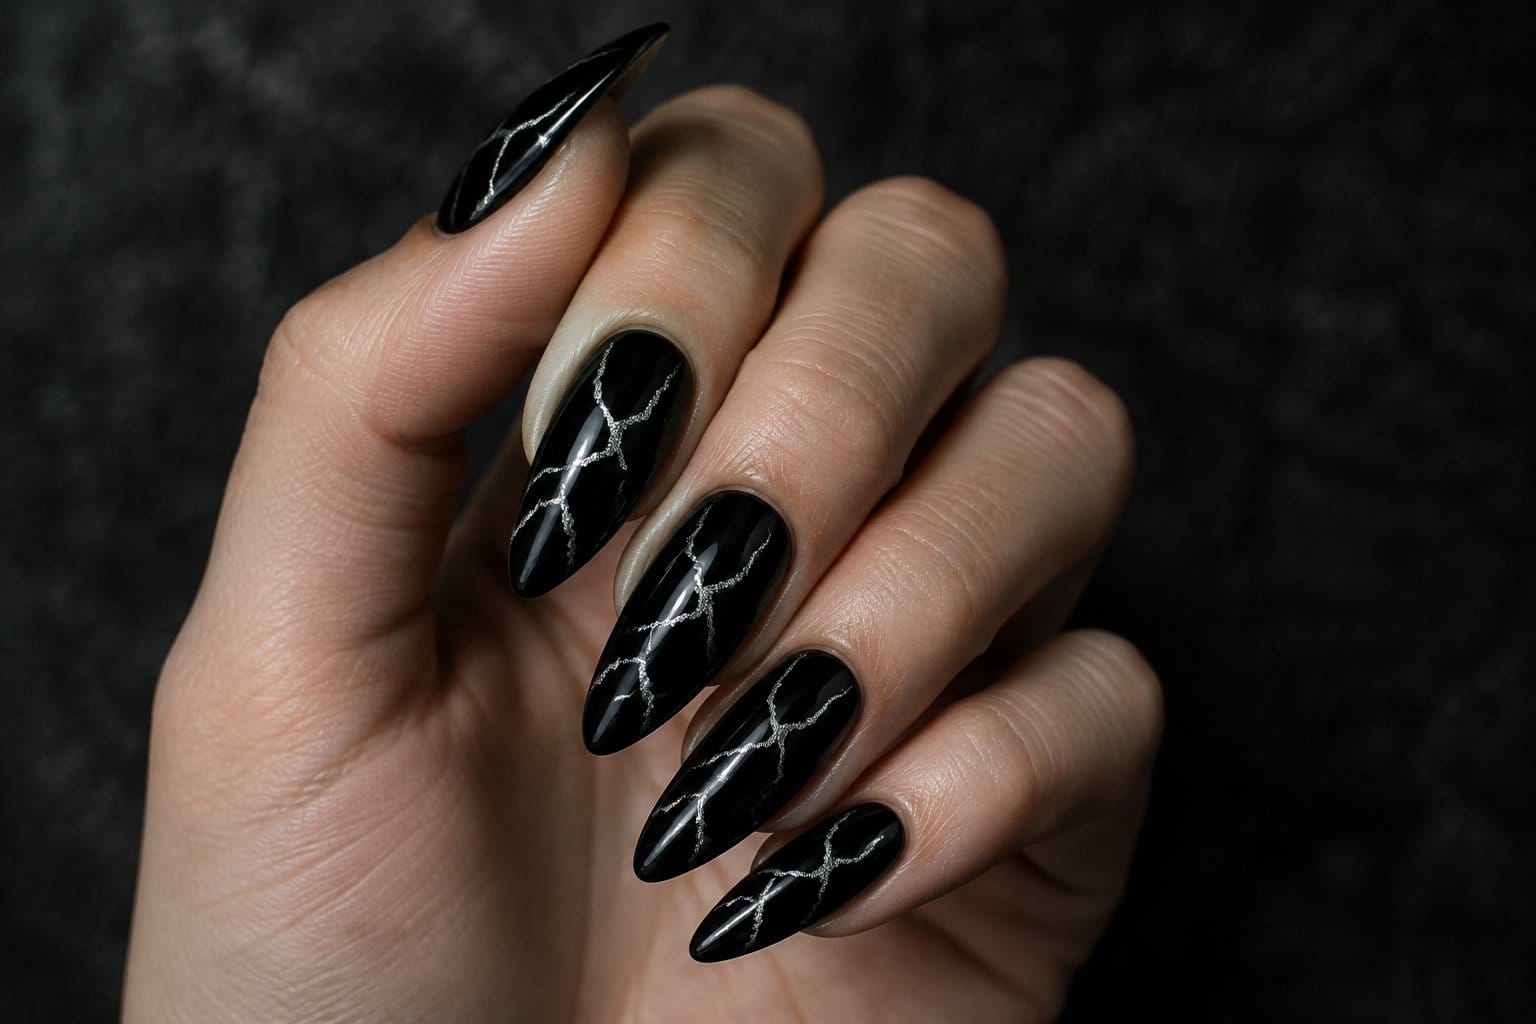
Jagged silver lines running across black nails look like lightning or cracked stone. It’s dramatic, a little rock-and-roll, and easier than it looks.
The details:
- Shape: Any
- Finish: Glossy black with metallic silver lines
- Accents: Silver chrome, silver foil, or a silver striper polish
- Motif: Zigzag bolts with small branches
Lightning isn’t supposed to be neat. That makes it perfect for shaky beginner hands. Use a thin striper brush or a silver nail art pen and draw one main zigzag, then add a few small branches.
Difficulty: Easy to medium. Foil striping tape also works for sharp lines, though it only makes straight segments.
For extra shine, have a salon do the lines in chrome over gel. The mirror finish makes the lightning look electric.
20) Short Black Nails with a Single Evil Eye Accent
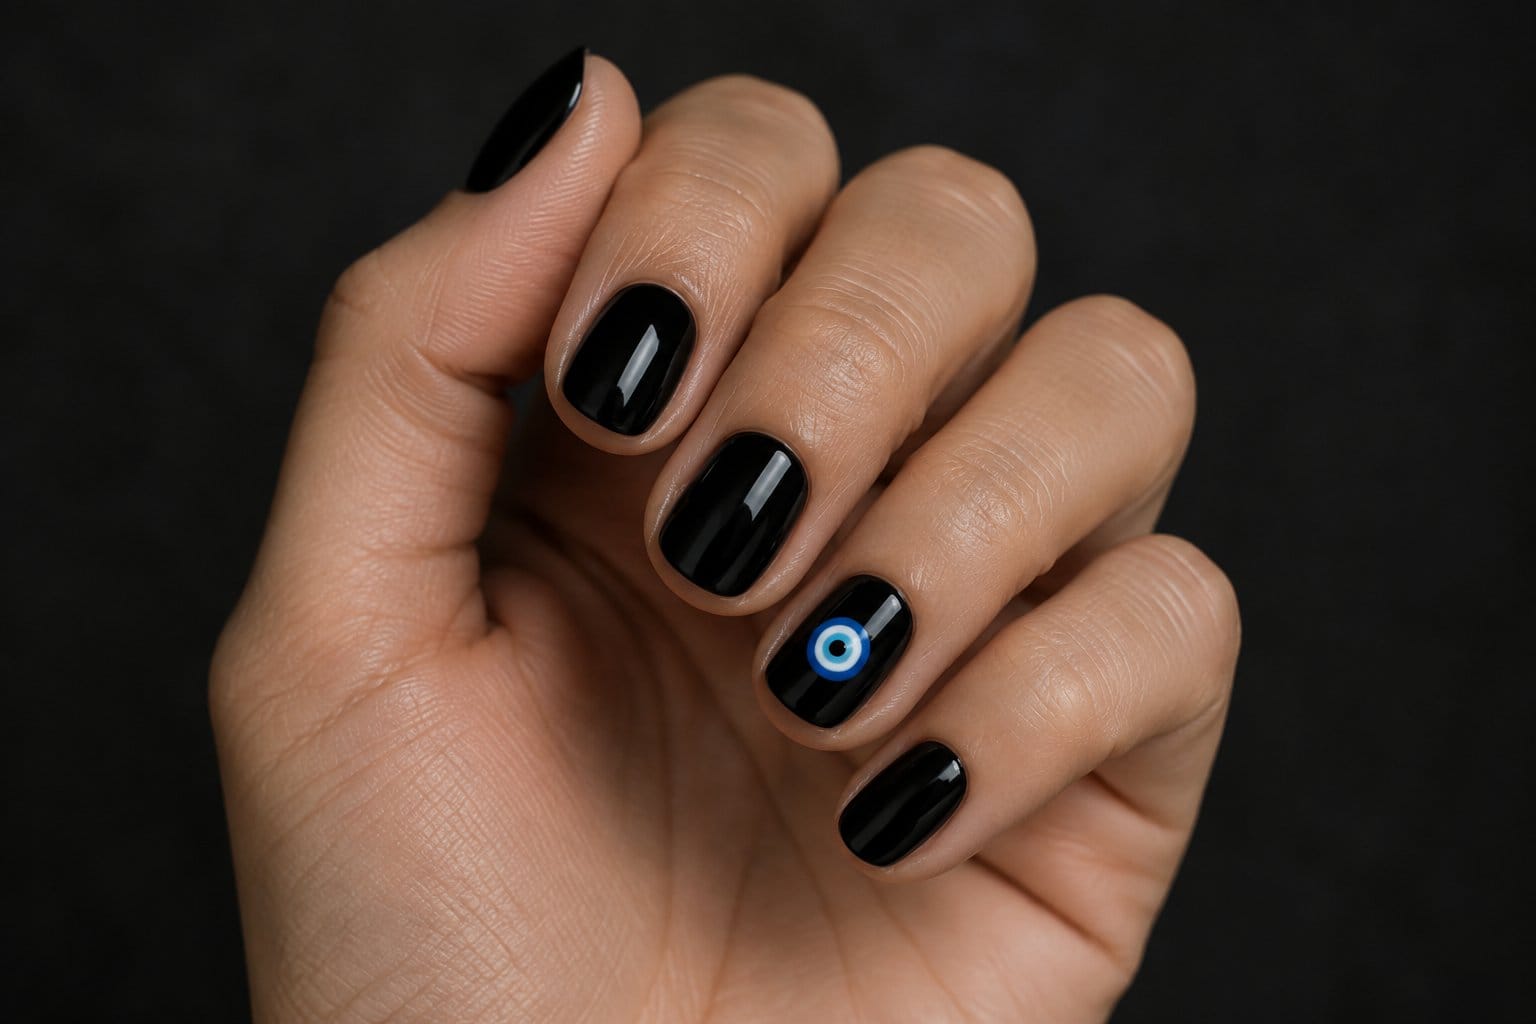
One blue-and-white evil eye on a short black set is a small detail with a lot of meaning. The evil eye is a long-standing protective symbol in many cultures, so this one works as a tiny charm you carry around.
The details:
- Shape: Short round or square
- Finish: Glossy
- Accents: Cobalt blue, light blue, white, and black
- Motif: One eye on your ring or index finger
The eye is just circles stacked inside each other: dark blue, white, light blue, then a black dot. A set of dotting tools in different sizes makes it quick.
Difficulty: Easy. Wait for each circle to dry before adding the next so the colors stay clean.
It’s low-key enough for almost any job and still clearly yours.
How to Make a Witchy Manicure Work for You
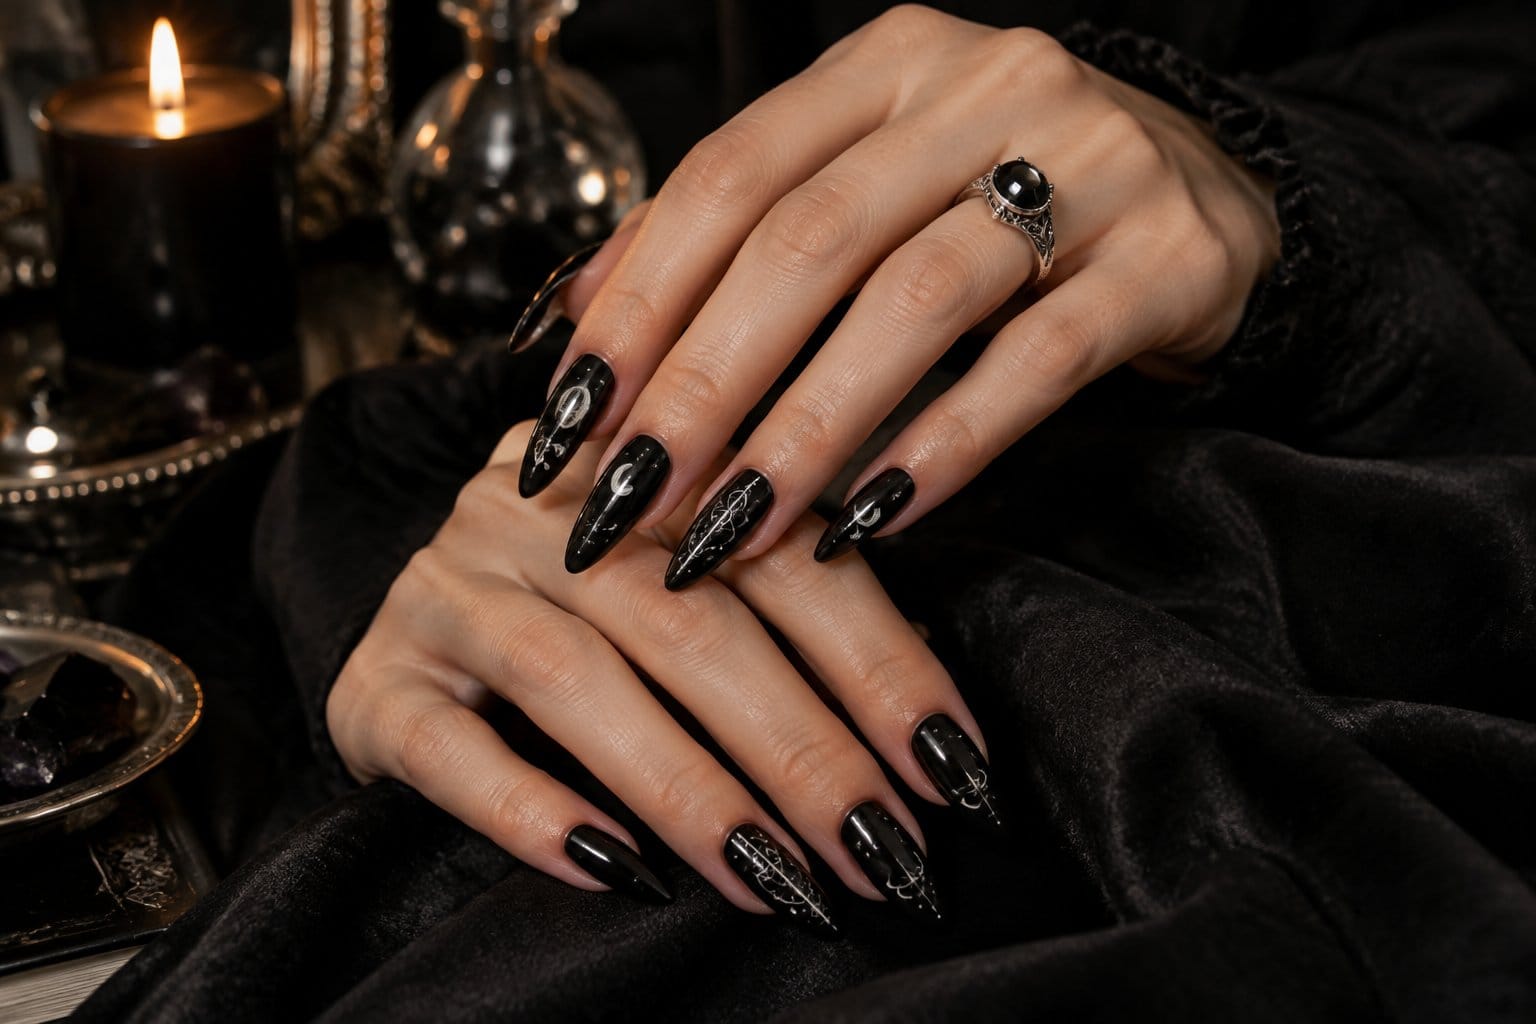
The best witchy manicure fits your hands, your schedule, and how much time you want to spend on it. Start by picking a shape you can live with, then choose details that match your skill level, then protect the finish so black stays sharp.
Which Nail Shape Suits Your Daily Routine?
Your shape decides how practical your nails feel. Here’s a quick guide:
| Shape | Best for | Witchy looks that shine on it |
|---|---|---|
| Round | Busy hands, childcare, lots of typing | Tiny crescents, evil eye |
| Square | Frequent hand use, fewer breaks | Lightning cracks, potion art |
| Coffin | Office life, flat space for art | Tarot cards, crystal ball |
| Almond | A slim look that holds up | Chrome, velvet, ombré |
| Stiletto | Statement looks and photos | Moon phases, filigree |
Square nails are among the strongest shapes because they keep the full width of your natural nail, while rounded edges cut down on scratches and grow out evenly, as this guide to matching nail shapes with your work routine explains.
Check your workplace rules first. Many hospitals and food service jobs require short, natural nails and ban artificial ones. In that case, short black nails with one accent are your best route.
Which Details Are Easiest to Do at Home?
Some techniques are friendly for beginners. Others really do need a pro. Here’s how they sort out:
- Easy at home: dotted stars, tiny crescents, evil eye, lightning lines, sponge ombré, black-on-black matte designs, cat-eye magnetic polish
- Doable with practice: spiderweb French tips, gold foil marble, pressed flowers, aura sponging, white symbol art
- Book a nail artist: tarot cards, serpents, potion bottles, detailed crystal balls, sculpted stilettos, chrome over gel
A few tools make home nail art much easier:
- A set of dotting tools in different sizes
- A long, thin striper brush for webs and lines
- A small flat brush dipped in remover for cleanup
- Makeup sponges for ombré and aura looks
- Nail stickers or decals for anything too detailed to paint
If painting isn’t your thing, press-ons are a shortcut. You can browse more ideas in our nails section.
How Can You Keep Dark Polish Looking Crisp?
Black shows every chip, so prep matters. Skip soaking your hands in water before painting. Nails absorb water and swell a little, and polishing them in that state makes chips more likely, according to celebrity manicurist Rita Remark’s at-home manicure method. She recommends a cuticle softener instead.
Follow these steps for a longer-lasting black manicure:
- Wipe each nail with polish remover or alcohol to remove oils.
- Use a base coat. It helps color stick and keeps dark shades from staining your nails.
- Apply two thin coats of black. Thick coats stay soft and dent easily.
- Seal with top coat, and wrap it over the free edge of the nail.
- Add a thin layer of top coat every two to three days to refresh the shine.
- Use cuticle oil daily so your skin looks neat around dark polish.
Cleanup is extra important with black. Keep a small brush and remover nearby and fix the edges before your top coat.
Frequently Asked Questions
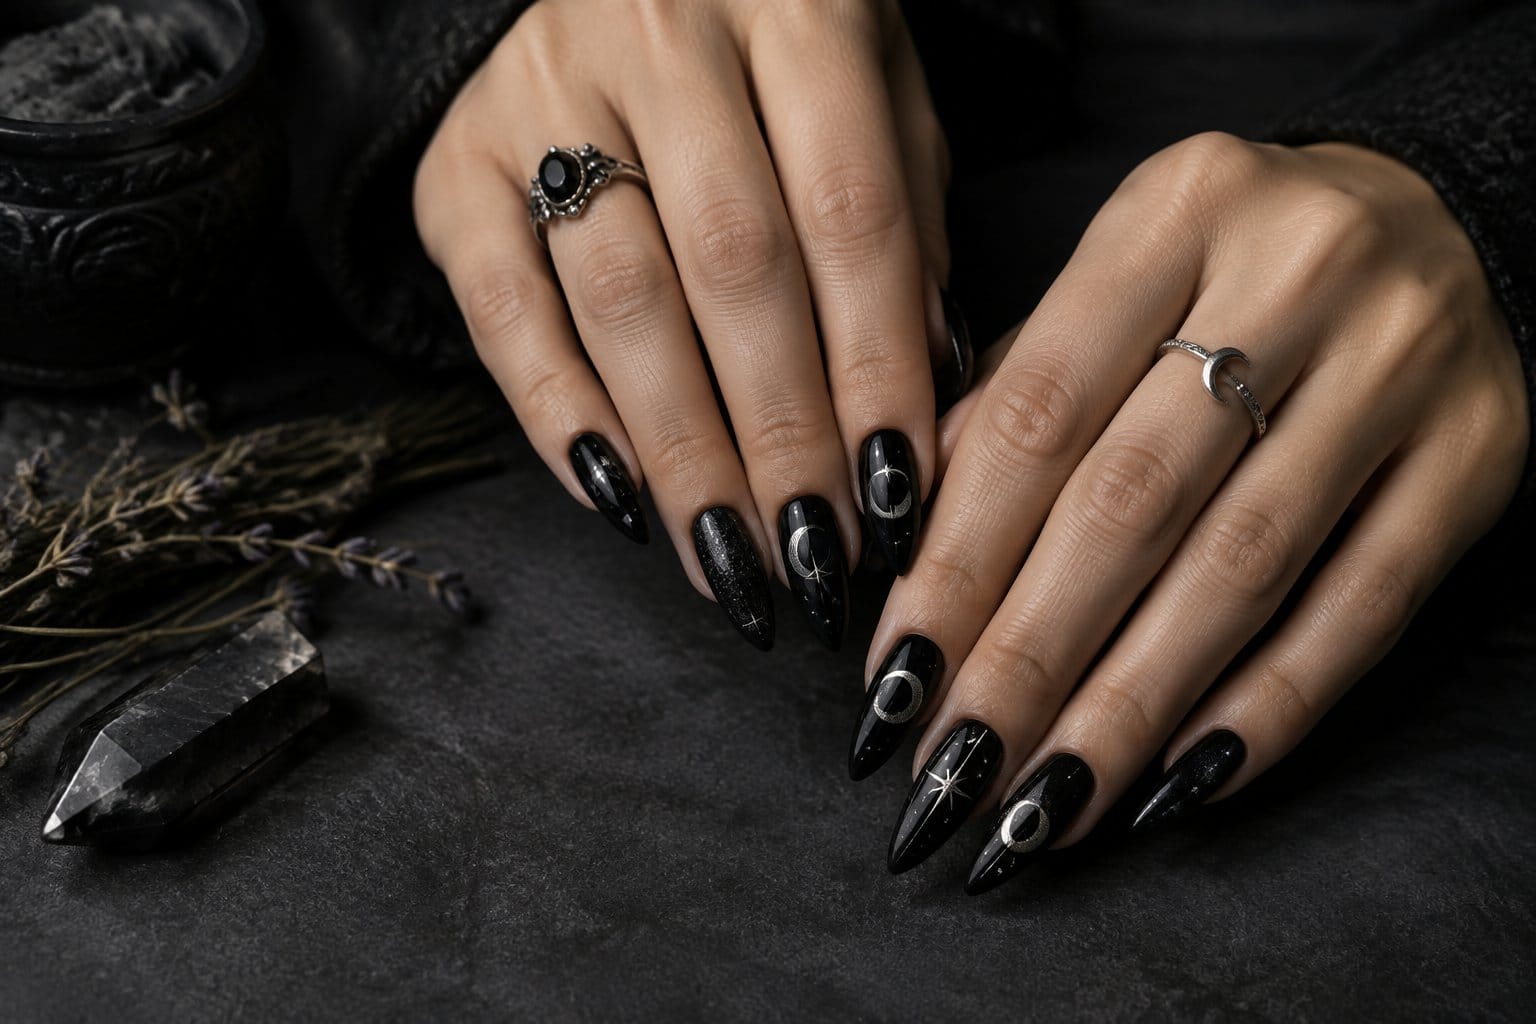
Can witchy nail designs work on short nails?
Yes, short nails look great with witchy designs. Keep the art small, like one crescent, a few stars, or a single evil eye. Glossy black makes short nails look neat and polished.
Which black witchy nail designs are easiest for beginners?
Tiny crescent moons, dotted stars, lightning cracks, and cat-eye magnetic polish are the easiest. They need only a dotting tool, a thin brush, or a magnet. Mistakes are small and easy to cover with a black touch-up.
Do moon phase designs work on coffin acrylic nails?
Yes, coffin acrylics work well for moon phases. The wide, flat tip gives each moon plenty of room. Place the moons in the center of each nail so the design lines up across your hand.
What colors pair well with black witchy nails?
Silver and gold are the classic matches, and they suit any motif. For color, try plum, emerald, blood red, cobalt blue, or smoky grey. Pick one accent color so the look stays dark and moody.
Can you wear black witchy nails outside Halloween?
Absolutely, black witchy nails work year-round. Choose subtle designs like marble, aura, filigree, or pressed flowers for everyday wear. Save drips and potion bottles for Halloween, and match them to your gothic Halloween decor ideas you can use all year.